
In summary:
- Swap your garden’s look annually by treating it like a fashion runway, using annuals as your dynamic color palette.
- Slash plant costs by over 90% by starting from seed, giving you the budget for a total color revolution each season.
- Master strategic plant selection for sun exposure and proper spacing to ensure your vibrant display thrives without succumbing to mildew.
- Implement choreographed transitions between seasons to maintain a seamless, professional-looking display from spring through fall.
- Balance short-term color impact (annuals) with long-term structure (perennials) for the best value and visual interest in pots and borders.
Is your garden stuck in a color rut? Every year, the same peonies bloom, the same hostas unfurl, and while beautiful, the predictability can feel uninspired. Many gardeners crave change, a fresh aesthetic, a completely new story told through flowers. The common advice is simply to « plant new annuals, » but this often leads to a haphazard collection of colors from the garden center, not a cohesive, high-impact design. It treats the garden as a space to fill, not a canvas to paint.
The true secret to a stunning annual transformation isn’t just about swapping plants; it’s about adopting the mindset of a color trend forecaster. It’s a strategic system of planning, sourcing, and transitioning that turns your garden into a seasonal runway, showcasing a new, deliberate color collection each year. But what if the key to this annual color revolution wasn’t a bigger budget, but smarter techniques? What if you could achieve a professional-level redesign while spending dramatically less?
This guide will move you beyond simple planting and into the art of palette-swapping. We will deconstruct the methods for achieving a complete visual overhaul year after year. We’ll explore the economics of seed starting, the science of extending bloom time, the critical choices for plant health and durability, and the design secrets for creating seamless transitions and resilient borders. Prepare to transform your garden from a static picture into a dynamic masterpiece of color.
This article provides a complete roadmap for orchestrating your garden’s annual color transformation. Below, you will find a detailed table of contents guiding you through each strategic step, from saving money on plants to designing traffic-resistant borders.
Table of Contents: Your Guide to a Yearly Garden Color Revolution
- Why Do Seeds Save You 90% on Annual Flower Displays?
- How to Deadhead Petunias to Get 3 More Months of Color?
- Impatiens or Marigolds: Which Won’t Die in the Afternoon Sun?
- The Spacing Mistake That Leads to Mildew in Annual Beds
- How to Transition from Spring Pansies to Summer Petunias Seamlessly?
- How to Transition Window Boxes from Summer to Fall in 3 Steps?
- Geraniums or Hostas: Which Offers Better Value for Patio Pots?
- How to Design Walkway Flower Borders That Withstand Heavy Foot Traffic?
Why Do Seeds Save You 90% on Annual Flower Displays?
The foundation of any ambitious annual color revolution is budget. The desire for sweeping beds of new, vibrant flowers each year can seem financially daunting when purchasing individual plants. However, the single most impactful strategy for unlocking this creative freedom is starting your annuals from seed. The cost difference isn’t minor; it’s transformative. A single packet of seeds, often costing just a few dollars, can yield dozens of plants, each of which would cost the same amount, or more, individually at a nursery. This shift in sourcing dramatically lowers the financial barrier to a full-scale redesign.
This economic advantage is well-documented. A comprehensive cost-benefit analysis confirms that starting from seed can lead to a >90% cost reduction per plant compared to buying established seedlings. This saving empowers you to think in terms of drifts and masses of color, rather than dotted individual plants. Furthermore, the world of seeds offers far greater variety than the typical garden center. You gain access to unique heirlooms, specific color-matched varieties, and new cultivars that allow you to execute a precise color palette that simply isn’t available off the shelf. While there’s an initial investment in soil, trays, and perhaps a simple grow light setup, the long-term return makes it the most value-driven design choice for any gardener wanting a new look every year.
Case Study: Large Garden Seed Starting Success
A gardener with a large plot documented saving hundreds of dollars annually by starting seeds indoors. By building a simple grow light stand with inexpensive shop fixtures and fluorescent bulbs, they achieved cost-effective propagation while accessing diverse heirloom varieties unavailable at local nurseries. This made seed starting particularly valuable for their goal of creating extensive annual displays, proving that a small upfront investment in equipment can unlock massive creative and financial potential for a seasonal runway of color.
How to Deadhead Petunias to Get 3 More Months of Color?
Once you’ve planted your vibrant annuals, the next goal is longevity. Nothing cuts a color story short like flowers that fade and stop blooming by mid-summer. The key to sustaining your display is a simple but often misunderstood technique: deadheading. For plants like petunias, this process is not just about tidying up; it’s a biological signal. When a flower fades, the plant’s energy shifts from producing more blooms to producing seeds. By removing the spent flower *and* the developing seed pod at its base, you trick the plant into returning to « bloom mode, » extending your display for weeks, even months.
The correct technique is crucial. Simply pulling off the dead petals is not enough. You must follow the flower stem down to just above the next set of leaves and make a clean cut. This removes the part of the plant that is consuming energy for seed production. As the Complete Gardening Expert Team notes, this small action has a huge impact.
When you deadhead properly, your petunias redirect energy from seed-making to bloom-making. This means bigger, fuller flowers and more of them.
– Complete Gardening Expert Team, Complete Gardening – Deadheading Petunias Guide
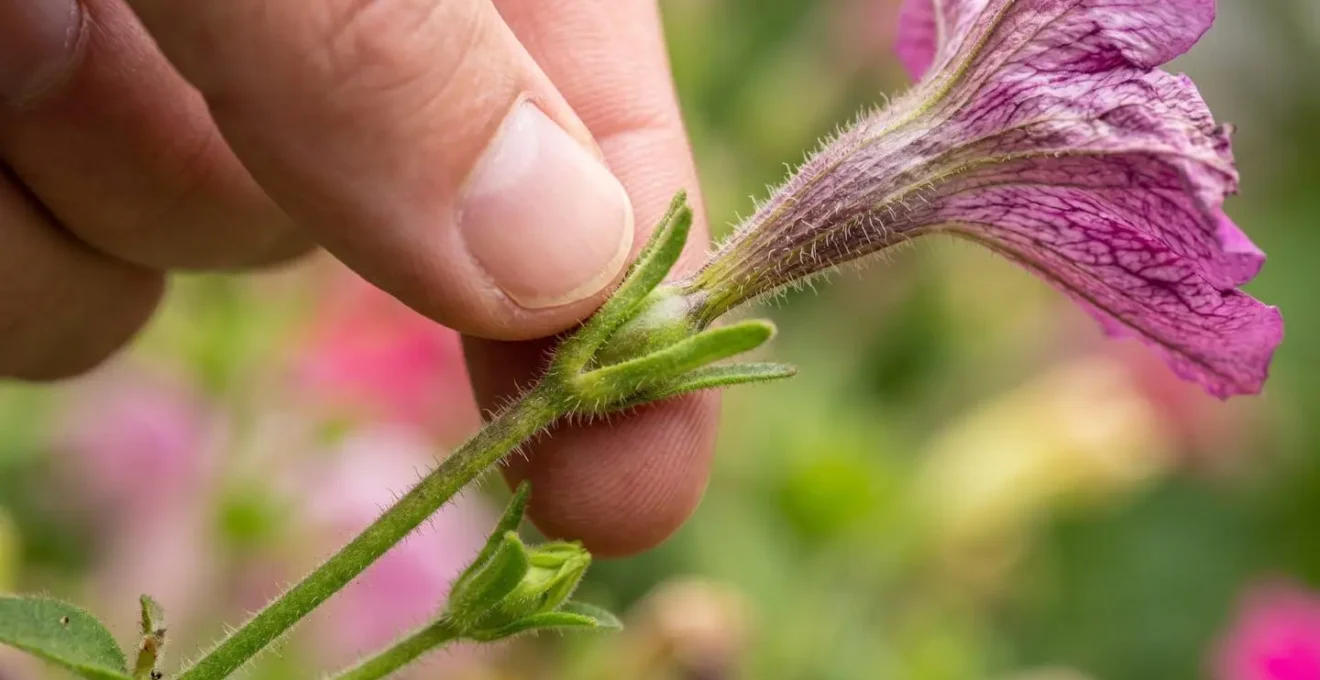
As the image demonstrates, locating the tiny developing seed pod at the base of the faded bloom is the key to effective deadheading. For a more dramatic refresh, especially when plants get leggy in late summer, a more aggressive approach is needed. This mid-season rejuvenation can shock the plants into a fresh, compact flush of growth for a spectacular fall finale.
Action Plan: Mid-Season Rejuvenation Pruning
- Identify leggy, tired petunias in late July showing reduced blooming and straggly stems.
- Using clean, sharp pruning shears, cut the entire plant back by 50% (the hard chop method).
- Apply a balanced 10-10-10 fertilizer immediately after pruning to support vigorous recovery.
- Water deeply and consistently for 7-10 days post-pruning to reduce stress and fuel new growth.
- Expect a compact flush of new growth within 2 weeks, leading to a spectacular late summer and fall display.
Impatiens or Marigolds: Which Won’t Die in the Afternoon Sun?
A bold color scheme is pointless if the plants can’t survive their environment. One of the most common design failures is placing plants in the wrong light conditions. The intense, often scorching, afternoon sun is a primary challenge for many annuals. Choosing between popular options like Impatiens and Marigolds isn’t just a matter of color; it’s a critical decision about sun tolerance. While classic Impatiens walleriana will quickly scorch and fail in direct afternoon sun, Marigolds thrive in it, making them a far more resilient choice for sun-drenched spots.
However, the world of annuals is constantly evolving. Plant breeders have specifically developed varieties to solve these exact problems. For example, the category of « Impatiens » is no longer monolithic. While standard Impatiens are strictly for shade, New Guinea Impatiens can handle morning sun, and the revolutionary SunPatiens® series is engineered to excel in full, hot sun. Understanding this spectrum is essential for any color trendsetter. Your design’s success hinges on matching the plant’s genetics to the location’s microclimate.
This table breaks down the light requirements and heat resilience of several popular annuals, providing a quick reference for making the right choice and ensuring your color palette doesn’t literally burn out.
| Plant Type | Light Requirement | Afternoon Sun Tolerance | Heat Resilience |
|---|---|---|---|
| Standard Impatiens | Partial to Full Shade | Poor (scorches) | Low |
| New Guinea Impatiens | Partial Sun/Shade | Moderate (morning sun best) | Moderate |
| SunPatiens | Full Sun to Partial Shade | Excellent | High (hot & humid tolerant) |
| Marigolds | Full Sun | Excellent | High |
| Lantana | Full Sun | Excellent | Very High (drought tolerant) |
| Vinca/Periwinkle | Full Sun | Excellent | Very High |
| Portulaca | Full Sun | Excellent | Very High (succulent) |
The exceptional performance of specific cultivars in harsh conditions provides the ultimate proof. The Louisiana Super Plant program, which trials plants in extreme southern heat, offers a powerful real-world example of how choosing the right variety is non-negotiable for a season-long display, as demonstrated by their selection of SunPatiens for superior performance.
The Spacing Mistake That Leads to Mildew in Annual Beds
A vibrant color display can be completely undermined by a single, pervasive issue: powdery mildew. This ghostly white film blankets leaves, saps plant vitality, and ruins the aesthetic you’ve worked so hard to create. While fungicides exist, the most powerful tool is prevention, and the number one preventable mistake gardeners make is improper spacing. Planting annuals too closely together creates a dense, humid environment with stagnant air—the perfect breeding ground for fungal diseases. Proper airflow is your best defense.
The temptation is to plant densely for an instantly full look, but this is a short-sighted strategy. You must plan for the plant’s mature size, not its size in the nursery pot. A bed that looks sparse at planting should fill in perfectly within a month. This initial patience pays off with healthier plants that are far less susceptible to disease. As garden design experts advise, creating space is a fundamental aspect of plant health. They recommend to » maintain adequate spacing between plants and keep them far enough away from walls and fences to ensure good air circulation. » This simple principle helps reduce the localized humidity that mildew thrives on.
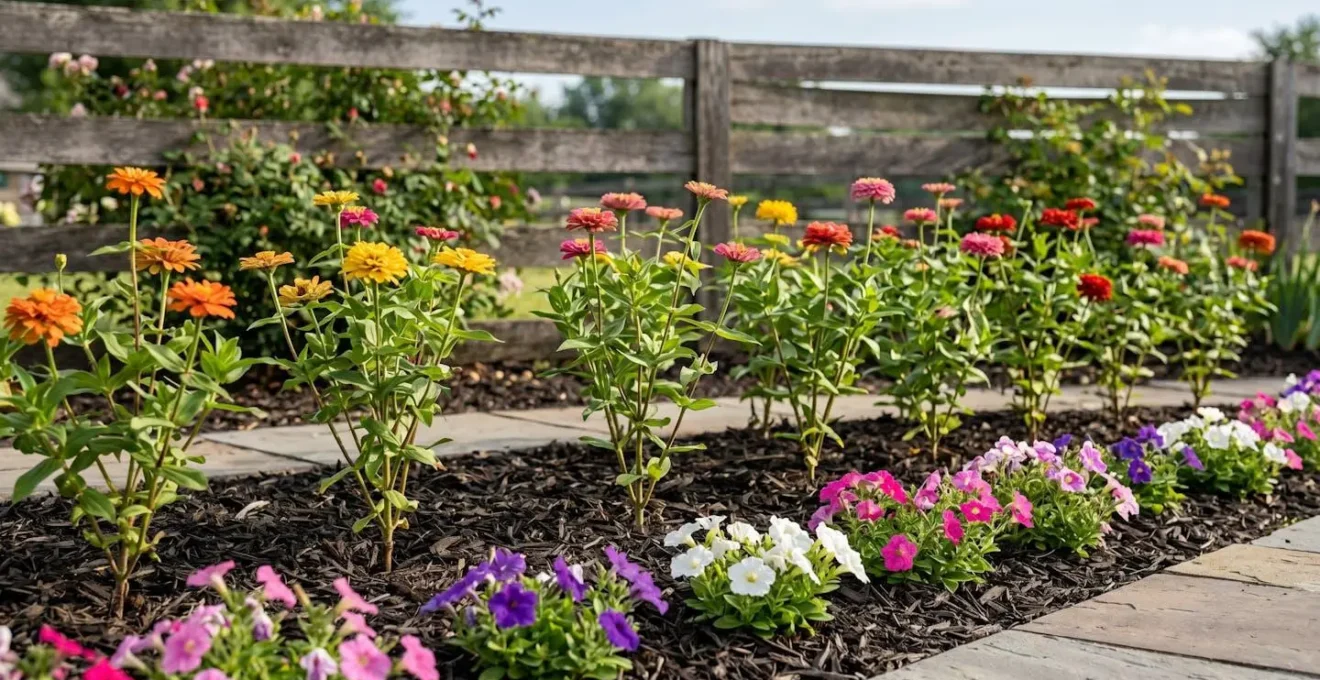
As shown, visible gaps between young plants are a sign of a well-planned bed, not an empty one. These channels allow air to circulate freely, drying foliage quickly after rain or morning dew. To build a truly resilient garden, combine this spacing strategy with smart watering practices and careful plant selection. This « Trifecta Prevention System » creates an environment that is actively hostile to mildew, ensuring your color runway remains pristine all season.
- Element 1 (Spacing): Follow mature-size spacing guidelines, not pot size—plants should look sparse at planting but fill in within 4 weeks.
- Element 2 (Watering): Water soil directly in the early morning (never overhead), allowing foliage to stay dry.
- Element 3 (Cultivar Selection): Choose mildew-resistant varieties like ‘Profusion’ zinnias or modern Wave petunias.
- Maintenance: Prune lower leaves every 2 weeks to maintain airflow.
- Emergency Response: If overcrowding occurs, perform sacrificial mid-season thinning by removing 20-30% of plants to save the rest.
How to Transition from Spring Pansies to Summer Petunias Seamlessly?
A true seasonal color revolution isn’t about having gaps of bare earth between acts. The mark of a sophisticated gardener is the choreographed transition—the seamless handover from one season’s stars to the next. The shift from cool-season spring pansies to heat-loving summer petunias is a classic example. The wrong approach is to wait until the pansies look completely spent, rip them out, and then plant new petunias, leaving an empty, recovering patch for weeks. The professional approach is to hide the next season’s performers in plain sight.
This involves a strategic overlap. Before the pansies have completely faded, you plant small, hardened-off petunias *amongst* them. The still-attractive spring flowers provide visual cover while the new summer annuals establish their root systems. When the pansies are finally removed, the petunias are already in place, acclimated, and ready to take center stage. A critical component of this process is « hardening off »—gradually acclimating indoor-grown or greenhouse-fresh plants to outdoor conditions. As research from Iowa State University Extension demonstrates, this requires a 7-day acclimation period required for transplant success. Skipping this step can shock and stunt the new plants, delaying your summer display.
By following a clear protocol, you can ensure there is no « off-season » in your garden beds. The transition becomes a fluid, continuous wave of color, not a series of stops and starts. This method ensures your garden runway is always camera-ready.
- Week 1-2: Purchase summer annuals (petunias) and begin the 7-day hardening off process in a protected location.
- Week 2 (Hiding in Plain Sight): Plant small hardened-off petunias amongst the fading pansies.
- Week 3: Remove the spent pansies, revealing the already-established petunias.
- Immediate Soil Recharge: Top-dress with 1-2 inches of compost and a slow-release granular fertilizer to feed the heavy-feeding petunias.
- Design Consideration: Choose complementary colors to create a beautiful transition, like moving from yellow pansies to blue or purple petunias.
How to Transition Window Boxes from Summer to Fall in 3 Steps?
The art of the seasonal color revolution extends to even the smallest spaces, like window boxes. Here, the transition from the lush, vibrant peak of summer to the rich, textural palette of autumn requires a curated approach. The goal is not to start from scratch but to edit and enhance. A complete overhaul is wasteful and unnecessary. Instead, think like an editor, identifying what elements from the summer display can form the structural backbone of the fall design.
Many summer survivors, such as ornamental grasses, trailing ivy, or the resilient foliage of Heuchera (Coral Bells), possess fantastic fall interest. These should be preserved. The process begins by selectively removing only the truly spent annuals, like petunias or geraniums that have succumbed to the cooling weather. This creates pockets for the new fall stars. This « Edit, Don’t Erase » philosophy saves time, money, and creates a more mature, layered look. The next step is to introduce a new color story based on a classic fall palette of oranges, deep reds, bronze, and purples. Foliage often becomes the main event here, with plants like ornamental kale, colorful Swiss chard, and bronze-toned Carex grass providing lasting color and texture.
The final, professional touch is to add an unexpected vertical element. This is what separates amateur designs from truly striking ones. Instead of just flowers, incorporate dried, non-plant materials like curly willow branches, thin corn stalks, or small gourds placed on skewers. This adds height, drama, and a textural complexity that perfectly captures the essence of the fall season. A final layer of mulch will help insulate the soil, protecting roots from early frosts and extending the life of your display.
- Step 1 (Edit, Don’t Erase): Identify and keep summer survivors with fall interest (grasses, ivy, Heuchera) as a structural backbone, removing only spent annuals.
- Step 2 (Fall Color Palette Shift): Design with a classic fall palette using foliage as the star (ornamental kale, Swiss chard) and mums or asters as supporting actors.
- Step 3 (Unexpected Vertical Element): Add dramatic, non-plant height with curly willow branches or dried corn stalks for professional textural interest.
Key takeaways
- Annuals offer unparalleled flexibility for a complete garden redesign each year, acting as a dynamic « paint » for your landscape canvas.
- The most cost-effective strategy for a large-scale color change is starting plants from seed, which can reduce costs by over 90%.
- A successful design depends on a combination of strategic plant selection (sun/shade tolerance), proper health management (spacing for airflow), and techniques to maximize longevity (deadheading, rejuvenation pruning).
Geraniums or Hostas: Which Offers Better Value for Patio Pots?
When designing for containers, the concept of a yearly color revolution introduces a compelling debate: annuals versus perennials. Which offers better value? The answer depends on how you define « value. » Geraniums (annuals) offer an explosion of continuous, vibrant color all summer long—a high-impact, short-term return. Hostas (perennials) offer long-term structural value with their dramatic foliage and textures, returning year after year with a single initial investment, but their bloom period is often brief and secondary to the leaves.
A simple cost analysis reveals the long-term economic advantage of perennials. While the initial cost might be identical, the need to repurchase annuals every single year adds up significantly over time. However, a pure perennial pot can feel static to a gardener craving seasonal change. For the color trend forecaster, the goal isn’t to choose one over the other, but to find a hybrid solution that delivers the best of both worlds: the long-term investment of perennials and the seasonal pop of annuals.
The following table illustrates the financial and aesthetic trade-offs over a three-year period, making it clear that value is a multi-faceted concept.
| Cost Factor | Geraniums (Annual) | Hostas (Perennial) |
|---|---|---|
| Year 1 Initial Cost | $15 | $15 |
| Year 2 Cost | $15 (repurchase) | $0 (returns) |
| Year 3 Cost | $15 (repurchase) | $0 (can be divided) |
| Total 3-Year Investment | $45 | $15 |
| Bloom Duration | Continuous summer | Brief (2-3 weeks) |
| Primary Feature | Vibrant flower color | Dramatic foliage texture |
| Maintenance | Deadheading, fertilizing | Minimal |
| Value Type | Short-term seasonal pop | Long-term structural investment |
The ultimate strategy is the « Pot-in-Pot » technique. This method uses a perennial (like a Hosta) as a permanent « thriller » element in a simple nursery pot, which is then sunk into a larger decorative container. The surrounding space is then filled with seasonal annuals. This allows you to easily swap out the annuals for a fresh color palette each season without disturbing the perennial’s root system, giving you structural permanence and creative flexibility.
How to Design Walkway Flower Borders That Withstand Heavy Foot Traffic?
The edges of walkways are prime real estate for showcasing your annual color scheme, but they are also the most vulnerable. Constant foot traffic, stray steps from guests, and the enthusiastic paws of pets can quickly trample a delicate border into oblivion. Designing for these high-traffic areas requires a strategy of resilience and subtle behavioral guidance. It’s not just about planting tough flowers; it’s about creating a system that protects them.
The most effective strategy is creating a multi-layered defense. First, establish a « buffer zone, » a 6- to 12-inch no-plant area directly beside the path made of mulch or low-profile stones. This creates a physical gap that absorbs accidental missteps. Next, implement a tiered planting system. The very front line (Tier 1), closest to the buffer, should consist of « bounce-back » plants like Creeping Thyme or tough Sedums that can tolerate being occasionally stepped on. Behind them (Tier 2), place resilient but less-tolerant plants like Lamb’s Ear or Catmint. Your more delicate, colorful annuals (Tier 3) are then safely positioned at the back of the border, shielded by the tougher front-line plants.
Finally, use plant selection as a form of « behavioral nudge. » Placing softer, lower-growing plants near the edge and taller or slightly spiky plants (like Salvia) further back subconsciously encourages people to keep their distance. As the design team at Proven Winners notes, simplifying your palette can also increase impact: » A limited selection of flower and foliage colors makes a garden easy on the eyes and even easier to plan. » This principle is especially effective in borders, where a strong, repeated color statement can guide the eye and define the space more clearly than a jumble of different plants.
Now that you are equipped with these strategies, the next step is to begin planning your own garden’s color revolution. Start by assessing your space, choosing a new color palette for the upcoming season, and mapping out your design with these principles of value, resilience, and transition in mind.