A large ceramic pot is not a mere container for flowers; it is a permanent piece of sculpture that defines the architectural soul of your garden.
- The pot’s value lies in its material integrity—determined by firing temperature and porosity—and its sculptural form, not its contents.
- Placement is an engineering decision (load-bearing) and an artistic one (negative space, light interaction) before it is a horticultural one.
Recommendation: Treat the selection and placement of a large pot with the same gravity as commissioning a significant piece of art for your home.
In the world of luxury landscape design, the conversation around large ceramic pots is often disappointingly superficial. It revolves around what to plant within them—a fleeting display of seasonal annuals, perhaps—or where to place them for simple, predictable symmetry. This approach relegates a potentially powerful design element to the status of a mere accessory, a temporary vessel for something more important.
This perspective fundamentally misunderstands the role of a significant ceramic piece. The true art lies not in what the pot contains, but in what the pot *is*. It is a piece of sculpture. It is an architectural anchor that grounds a design scheme. Its texture, colour, and form command space, manipulate light, and contribute a sense of permanence and history to the garden narrative. We have been asking the wrong questions.
But if the true value is not in the planting, but in the object itself, how do we shift our thinking? The key is to stop treating it like a planter and start treating it like architecture. This guide moves beyond horticulture to explore the essential considerations of material science, structural engineering, and artistic composition. We will examine the vessel as a focal point, understanding its physical properties, its interaction with the environment, and its profound impact on the spaces it inhabits.
This article provides a structured approach to selecting, placing, and maintaining large ceramic vessels as the powerful architectural statements they are. Follow along as we deconstruct the critical decisions that transform a simple pot into the very soul of your garden design.
Summary: The Art of the Architectural Statement Pot
- Why Do Cheap Ceramics Crack in Winter While Quality Ones Survive?
- How to Fill the Bottom of a Giant Pot to Save on Soil?
- Matte or Gloss: Which Finish Suits a Mediterranean Garden Style?
- Why Must You Check Load-Bearing Capacity Before Buying Large Pots?
- The Lifting Error That Causes Back Injury for Gardeners
- When to Wrap Your Ceramics to Prevent Freeze-Thaw Damage?
- How to Shear Boxwood into Perfect Spheres Without Holes?
- How to Maintain Evergreen Boxwoods for Crisp, Year-Round Structure?
Why Do Cheap Ceramics Crack in Winter While Quality Ones Survive?
The resilience of a ceramic pot is not a matter of luck, but of physics and fire. A cheap, low-fired terracotta pot is highly porous. It acts like a sponge, absorbing moisture from soil and air. When temperatures drop below freezing, this trapped water expands by approximately 9%, exerting immense internal pressure that leads to spalling, cracking, and eventual structural failure. This is the simple, brutal reason why mass-market ceramics often don’t survive a single harsh winter.
In contrast, high-quality, investment-grade ceramics undergo a process of vitrification. Fired at extreme temperatures—where porcelain fires at 1280°C versus stoneware at 1200°C—the clay particles fuse together, creating a much denser, glass-like body with minimal porosity. A vitrified pot might have a water absorption rate of less than 5%, rendering it largely impervious to the destructive freeze-thaw cycle.
Therefore, the first act in selecting an architectural pot is to inquire about its firing process. You are not just buying a shape or a colour; you are investing in material permanence. A high-fired pot is a commitment to a lasting sculptural element, while a low-fired pot is often a temporary, and ultimately more expensive, placeholder. The price difference reflects a profound divergence in durability and longevity, making it the most critical decision in the entire process.
How to Fill the Bottom of a Giant Pot to Save on Soil?
A common hesitation with large-scale pots is the sheer volume—and cost—of soil required to fill them. More importantly, filling a three-foot-tall pot entirely with soil creates unnecessary weight and can lead to compacted, waterlogged conditions detrimental to plant health. The professional solution is not to fill it completely, but to create a ‘false bottom’.
This technique involves using lightweight, stable filler materials to occupy the lower portion of the pot, leaving only the necessary depth for the plant’s root system. This dramatically reduces the amount of expensive potting mix needed and significantly lessens the overall weight—a critical factor for pots on decks or balconies. However, the choice of filler is paramount. Avoid materials that will compress or decompose, such as packing peanuts or wood chips, as they will cause the soil level to sink over time.
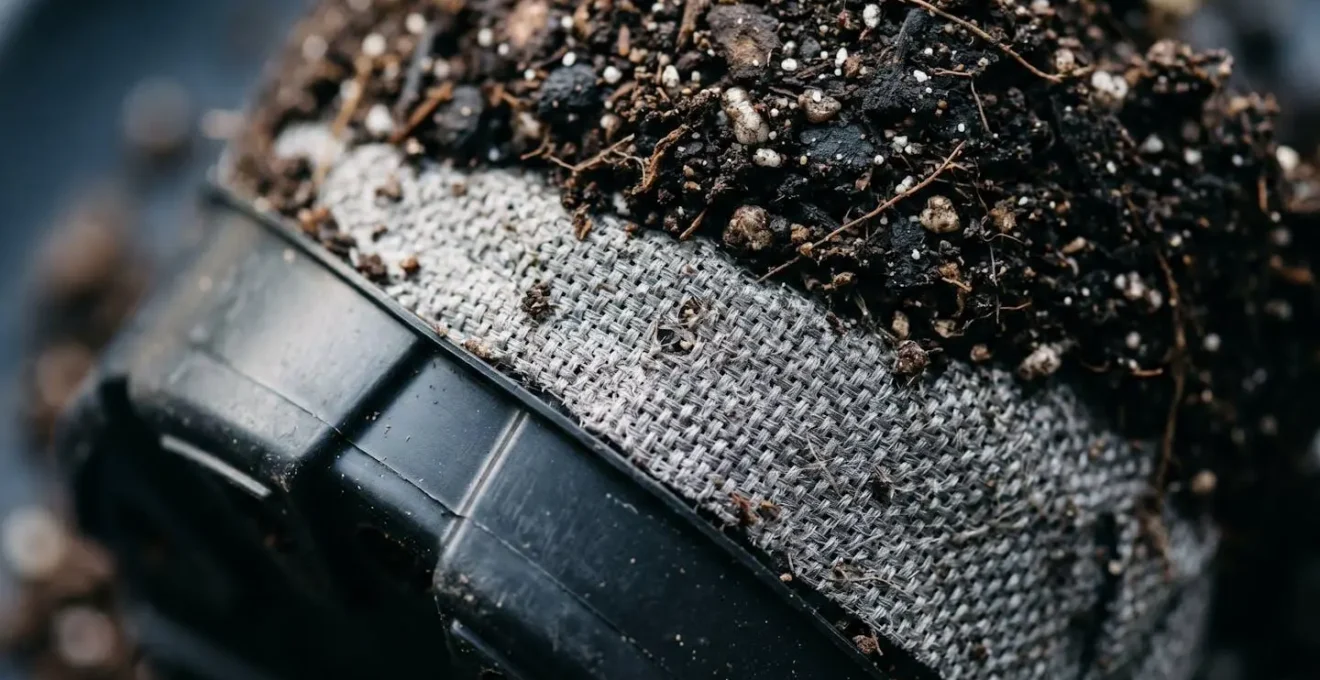
The most reliable method involves using inverted, sturdy plastic nursery pots or purpose-made planter inserts to create a solid, stable platform. As seen in the diagram, this creates a void that is both light and structurally sound. A layer of permeable landscape fabric is then placed over this platform to prevent soil from washing down while still allowing excess water to drain away freely. This ensures a healthy root environment in a pot that is manageable and economically filled.
Action Plan: The Professional Filler Method
- Determine a Plant’s True Soil Needs: Research the specific root depth required. Most annuals need only 12-18 inches, while shrubs and small trees thrive in 24-36 inches. Measure this from the top of the pot down.
- Create a Stable False Bottom: Invert sturdy plastic nursery pots or use a commercial planter insert to create a solid platform at the required depth. Ensure it’s stable and won’t shift.
- Install a Permeable Barrier: Lay a piece of high-quality landscape fabric over the false bottom, extending it a few inches up the sides. This separates soil from the void while allowing drainage.
- Use a Container-Specific Potting Mix: Never use heavy garden soil, which compacts and drains poorly. Fill the top section with a high-quality potting mix designed for container aeration and moisture retention.
- Ensure Adequate Root Zone: Confirm that the final soil layer provides ample room for the plant’s root ball to establish and grow without being constricted against the false bottom.
Matte or Gloss: Which Finish Suits a Mediterranean Garden Style?
The surface finish of a ceramic pot is a primary design choice that dictates its interaction with light and its role in the garden’s narrative. In a Mediterranean setting, defined by intense sunlight, earthy textures, and a dialogue between nature and ancient architecture, both matte and gloss finishes have a powerful, albeit different, story to tell.
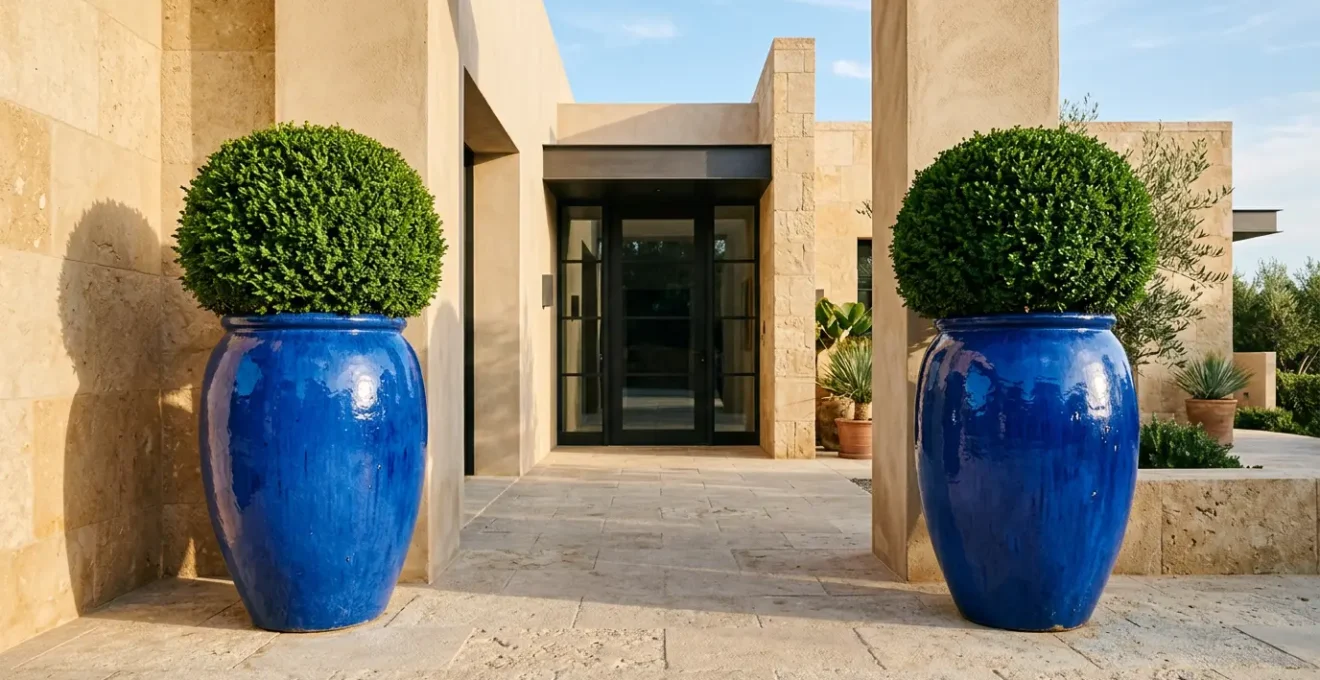
A matte or unglazed terracotta finish is the quintessential choice for raw, sun-baked authenticity. It absorbs light, which emphasizes the pot’s sculptural silhouette and form over its surface. This texture connects the vessel to the earth, stone, and stucco around it, feeling as though it has been part of the landscape for centuries. Over time, it will develop a beautiful patina of moss and mineral deposits, deepening its character and sense of history.
Conversely, a high-gloss glazed finish, particularly in a vibrant cobalt blue or brilliant white, introduces a different kind of Mediterranean spirit—that of the sea, the sky, and polished decorative tiles. A glossy surface reflects light, creating dynamic, shifting highlights that draw the eye and create a sense of vibrancy and liquid coolness. It provides a polished, contemporary counterpoint to the rustic textures of the garden. A high-quality glaze is also highly durable and resists aging, maintaining a clean, sophisticated look for decades.
This decision is not merely aesthetic; it’s a strategic choice about how the architectural anchor will perform in its environment. One absorbs the story of time and sun, the other reflects the energy of the moment.
| Characteristic | Matte/Unglazed Terracotta | Glossy Glazed Finish |
|---|---|---|
| Light Interaction | Absorbs light, emphasizes form and sculptural silhouette | Reflects light, creates bright highlights and visual pop |
| Aesthetic Story | Ancient, sun-baked, earthy authenticity | Coastal, vibrant, polished sophistication (cobalt blue evokes sea/tiles) |
| Aging/Patina | Develops beautiful moss and mineral deposit patina over time | High-quality glaze resists aging, maintains clean contemporary look for decades |
| Best Placement | Strong sunlight areas where texture is emphasized | Shady corners needing brightening, architectural focal points |
| Durability | More porous, requires sealing for frost protection | Vitrified glaze provides superior weather resistance |
As this comparative analysis of glaze finishes shows, the choice fundamentally alters the vessel’s character and function within the design.
Why Must You Check Load-Bearing Capacity Before Buying Large Pots?
Before falling in love with the sculptural form of a massive ceramic pot, the first consideration must be brutally practical: engineering. A large pot is an immense, concentrated load. The aesthetic vision is irrelevant if the structure beneath it cannot handle the weight. Underestimating this force is not just a design flaw; it is a significant safety and financial risk.
The numbers are staggering. As a rule of thumb, professional landscape designers calculate that a 250-liter pot filled with wet soil can weigh approximately 400+ kg (900+ lbs). Placing this much weight on a wooden deck, balcony, or rooftop garden without proper assessment can lead to catastrophic failure. Even if the structure doesn’t collapse, the sustained pressure can cause permanent deck sagging, compromise waterproofing membranes, and create costly long-term damage.
The location of the pot is therefore dictated by the structure below. On a deck, it must be positioned directly over structural joists or beams, not in the center of a span where leverage is greatest. For any rooftop or balcony installation, consulting a structural engineer is not an optional step; it is a mandatory part of the design process. The pot is an architectural element, and it must be integrated with the same structural diligence as any other part of the building.
Case Study: Structural Considerations for Rooftop and Deck Placement
Commercial landscape installation studies reveal a critical best practice: large, filled planters must be positioned directly over structural joists or beams, typically near building walls, rather than in the center of deck spans. This is because the center of a span has the least support and is most vulnerable to leverage and bending forces. Beyond the immediate risk of catastrophic failure, these studies highlight the insidious, long-term damage of improper placement. Sustained concentrated loads can cause permanent deck board sagging, compromise underlying waterproofing membranes on balconies leading to interior leaks, and induce slow structural fatigue that accumulates costly damage over many seasons. For any significant rooftop garden project, consulting a structural engineer is deemed an essential, non-negotiable step to prevent these outcomes.
Action Plan: Auditing Your Garden for a Statement Vessel
- Points of Contact: Identify all potential locations for the pot (patio, deck, lawn, entryway). These are your candidate sites.
- Structural Collection: Inventory the material and support structure of each site. Is it solid ground, concrete slab, or a suspended wooden or composite deck? For decks, locate the joists.
- Load-Bearing Coherence: Confront the pot’s potential weight (pot + wet soil) with the surface’s capacity. Does a 900+ lb load align with the structural integrity of a mid-span deck board? The answer is almost always no.
- Aesthetic Mémorabilité: At each viable location, evaluate the sightlines. Does the pot create a powerful focal point, terminate a vista, or feel lost? Consider the negative space around it.
- Integration Plan: Based on the audit, create a priority list of placements. Finalize the single location that satisfies both the non-negotiable structural requirements and the highest artistic impact.
The Lifting Error That Causes Back Injury for Gardeners
The sheer mass of a large ceramic pot makes moving it a hazardous activity. While gardening is often perceived as a gentle pastime, the reality is that it can be physically demanding and dangerous if proper techniques are ignored. Indeed, data shows that approximately 400,000 gardening injuries require emergency room treatment annually in the United States, with improper lifting being a primary culprit.
The single most common and dangerous lifting error is using the back muscles instead of the leg muscles. When a person bends at the waist to lift a heavy object, they place enormous strain on the lumbar spine. Compounding this error is holding the object at arm’s length, which multiplies the force on the back by up to ten times. The third critical mistake is twisting the spine while carrying the load. This combination—bending, extending, and twisting—is a perfect recipe for a debilitating back injury.

Correct form is non-negotiable. As the image demonstrates, the power must come from the legs. By bending at the knees and hips while keeping the back straight, you engage the large, powerful muscles of the thighs and glutes to do the work. The pot should be held as close to the body’s center of gravity as possible. To change direction, one must move their feet, never twisting the torso. For truly massive pots, specialized tools like pot lifter straps or heavy-duty hand trucks are not a luxury; they are essential safety equipment that transforms a dangerous lift into a safer, more manageable action.
Adopting these professional biomechanics is paramount:
- Lift with Your Legs: Always bend at the knees and hips, keeping your back straight.
- Hold the Load Close: Keep the pot tight against your torso to minimize leverage on your spine.
- Do Not Twist: Pivot with your feet to turn. Keep your nose aligned with your toes.
- Use the Right Tools: Employ pot lifters, dollies, or hand trucks for any significant weight.
- Move It Once: Decide on the final placement while the pot is empty to avoid repeated, strenuous repositioning.
When to Wrap Your Ceramics to Prevent Freeze-Thaw Damage?
Protecting a ceramic investment through winter is an art of timing, driven by an understanding of moisture and temperature, not the calendar. The greatest threat to a pot is not a sustained, deep freeze, but the repeated cycle of freezing and thawing that often occurs in late autumn and early spring.
It’s the freezing and thawing, not the deep cold, that destroys terracotta. A pot can survive -10°F steady cold better than mild weather that bounces between 28°F and 35°F.
– Terracotta winter protection research, Bloomist – Cold Weather Effects on Terracotta
This counter-intuitive insight is the key. During these transitional periods, a pot saturated by autumn rains can freeze at night, thaw during a sunny day, become saturated again, and re-freeze. Each cycle expands and contracts the trapped moisture, relentlessly stressing the ceramic’s structure. Therefore, the critical moment for protection is not the first frost, but when the soil is thoroughly wet *and* the first hard freezes (below 28°F / -2°C) are imminent.
The method of protection is equally important. Wrapping a pot in plastic is a common mistake; it traps moisture against the ceramic surface, potentially worsening the problem. Instead, use breathable materials like thick burlap, which insulates while allowing moisture to escape. Elevating the pot on ‘pot feet’ or blocks is another crucial step. This prevents the base from freezing to the ground and ensures the drainage hole remains clear, stopping the pot from becoming a water-logged ice block from the bottom up. By understanding the true enemy—the freeze-thaw cycle—you can take precise, effective action to ensure your architectural vessel endures for generations.
Key Takeaways
- Material is Destiny: The longevity of a ceramic pot is determined by its firing temperature. High-fired, vitrified ceramics are an investment in permanence; low-fired pots are temporary.
- Placement is Architecture: The weight of a large, filled pot is a structural engineering consideration first and an aesthetic choice second. Always verify load-bearing capacity.
- Planting is Sculpture: The plant within the vessel should complement its form, creating a unified sculptural statement that provides year-round structure and interest.
How to Shear Boxwood into Perfect Spheres Without Holes?
Once the ceramic vessel is chosen and placed, the planting itself becomes the next sculptural act. For a crisp, architectural look, nothing surpasses the timeless elegance of a perfectly sheared boxwood sphere. Achieving this flawless form, however, requires a specific technique and mindset, moving beyond simple trimming to a more deliberate act of carving.
The first step is to adopt a sculptor’s mentality. You are not just ‘trimming the bush’; you are carving away everything that is not the perfect sphere you visualize. This mental shift encourages more decisive, confident cuts. The process is best executed with two distinct tools in a two-step process. First, use long-bladed hedge shears for the ‘rough cut’. Stand back and use broad, sweeping motions to define the overall spherical shape, constantly moving around the plant to maintain a consistent curve. This initial pass establishes the foundational form.
Second, switch to small, sharp, one-handed topiary shears for the detail work. This is where the perfection lies. Use these smaller shears to snip individual stems and fine-tune the curve, correcting any flat spots or irregularities left by the larger blades. Work in multiple passes, taking a few steps back after each one to assess the overall shape from a distance and different angles. This continuous reassessment is crucial for achieving a truly spherical form. Rushing the process or trying to perfect it in a single pass is the most common cause of creating unintentional flat sides or holes.
Finally, timing is critical. Never shear boxwoods after mid-summer. Late-season trimming stimulates a flush of tender new growth that does not have time to harden off before the first frost. This vulnerable growth will be killed by the cold, resulting in unsightly brown patches and ‘holes’ in your perfect sphere by the following spring.
How to Maintain Evergreen Boxwoods for Crisp, Year-Round Structure?
Shearing creates the form, but maintenance sustains the vision. A perfect boxwood sphere is not a one-time creation; it is the result of consistent, intelligent care that promotes dense, healthy foliage year-round. The crisp, architectural silhouette of a well-maintained boxwood depends as much on what happens at the root level as it does on the blade of the shears. A poorly nourished or unhealthy plant will never hold its shape, no matter how skilled the pruning.
Landscape professionals emphasize that crisp boxwood form depends on dense foliage created through proper nutrition. A balanced slow-release fertilizer applied in spring promotes compact growth, while high-nitrogen fertilizers should be avoided as they encourage weak, floppy shoots that ruin the structured silhouette. The ‘open the center’ technique – selectively thinning a few small interior branches – improves air circulation to prevent boxwood blight while allowing sunlight penetration that keeps inner foliage alive, preventing the hollowed-out appearance in older specimens.
– Professional horticulturist insight
This expert advice highlights two pillars of maintenance: nutrition and aeration. A balanced, slow-release fertilizer provides the steady energy needed for tight, compact growth. High-nitrogen feeds, in contrast, force long, lanky shoots that are weak and detract from the desired dense form. They create a shaggy appearance that undermines the entire sculptural effect.
The second pillar, aeration, is a more nuanced technique for long-term health. Periodically ‘opening the center’ by selectively thinning a few small branches from the interior of the plant might seem counter-intuitive, but it is vital. This practice improves air circulation, which is the best defense against fungal diseases like boxwood blight. Furthermore, it allows sunlight to penetrate deeper into the plant, encouraging the inner leaves to remain green and healthy. This prevents the ‘hollowed-out’ look that can plague older, untended specimens, ensuring the sphere is a solid, vibrant form from its surface to its core.
By treating the ceramic pot as a piece of architecture and the plant within it as living sculpture, you elevate your garden design from a collection of objects to a cohesive, intentional, and timeless statement. Begin by auditing your landscape not for a place to put a plant, but for a space that demands a sculpture.