The secret to a thriving hanging basket isn’t more frequent watering; it’s engineering a self-sufficient, water-retentive ecosystem from the inside out.
- The most common liner, coco fiber, is often the main cause of rapid drying due to its wicking properties, but it can be easily modified.
- Combining plants with similar water needs and creating a high-humidity microclimate can reduce watering frequency by up to 40%.
Recommendation: Start by modifying your basket’s liner with a simple plastic sheet and cellulose sponge pieces to create internal water reservoirs before you even add soil.
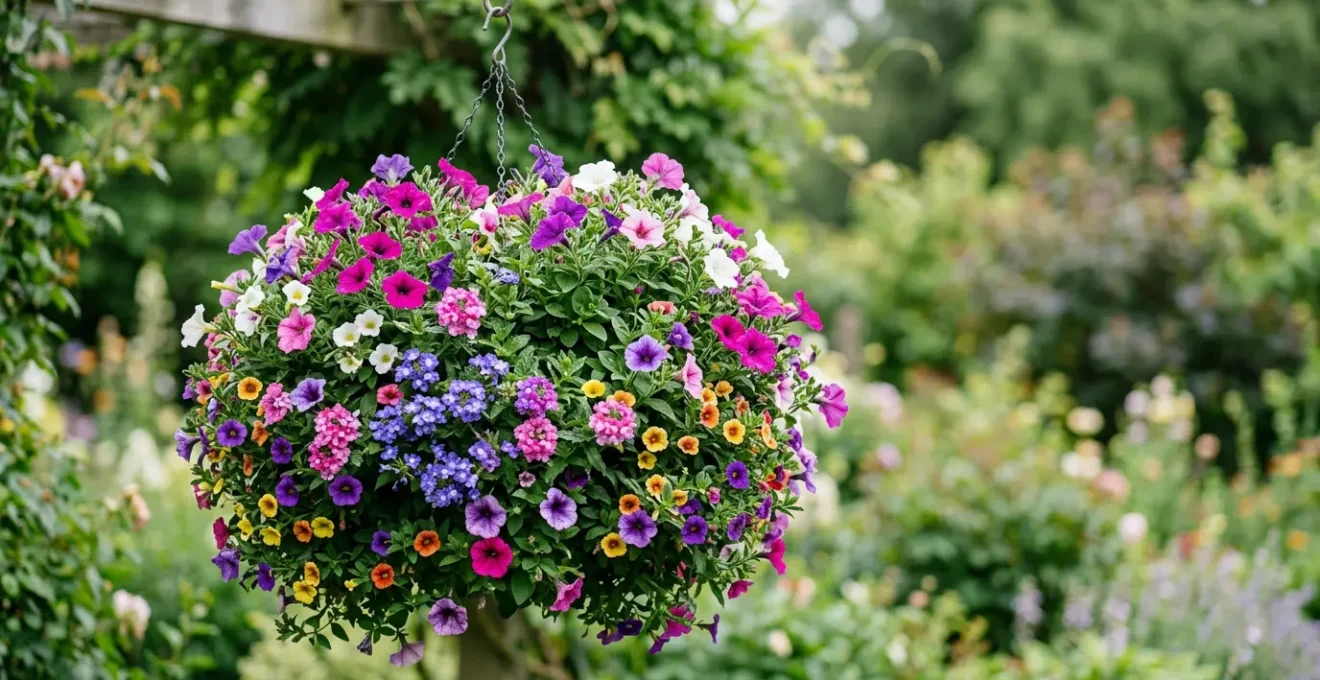
There’s a familiar disappointment for any urban gardener: you craft the perfect, overflowing hanging basket, a vibrant sphere of color, only to find it wilted and bone-dry by late afternoon. The conventional wisdom to simply water it twice a day feels less like gardening and more like a high-maintenance chore. This constant cycle of saturation and desiccation is not only frustrating but also detrimental to plant health, leading to stressed roots and washed-out nutrients.
Many common solutions, like using standard coco liners or just picking « drought-tolerant » plants, only address the symptoms. They don’t tackle the fundamental physics of a small container suspended in the air, exposed to wind and sun from all sides. The real problem isn’t your watering schedule; it’s the basket’s design. It’s an open system hemorrhaging moisture at an unsustainable rate.
But what if the key wasn’t to fight against this water loss, but to re-engineer the basket itself into a closed, water-retentive ecosystem? The solution lies not in adding more water from the outside, but in building a system that holds and recycles moisture from the inside. It’s about turning the liner from a liability into an asset and transforming a collection of individual plants into a cooperative, self-regulating microclimate.
This guide will deconstruct the hanging basket, showing you how to build a truly gravity-defying, lush display that thrives without daily drenching. We will explore each component—from the liner to the soil to the plants themselves—and reveal the techniques to create a beautiful, low-maintenance green sanctuary.
To navigate this deep dive into creating self-sufficient hanging baskets, the following summary outlines the key systems we will engineer for long-lasting, vibrant displays.
Summary: A Systematic Guide to Engineering Water-Wise Hanging Baskets
- Why Do Coco Liners Cause Baskets to Dry Out Faster?
- How to Mix Trailers and Fillers for a Perfect Sphere Shape?
- Chain or Rope: Which Suspension Material Withstands Wind Better?
- The Nutrient Deficiency Mistake That Yellows Hanging Leaves
- When to Prune Hanging Baskets to Trigger a Second Flush?
- How to Pin Ivy to Masonry for Even Coverage?
- How to Deadhead Petunias to Get 3 More Months of Color?
- How to Transform a Small Balcony into a Private Green Sanctuary?
Why Do Coco Liners Cause Baskets to Dry Out Faster?
The paradox of hanging baskets is that their most popular liner, the natural-looking coco fiber, is also a primary culprit for rapid water loss. While it provides excellent aeration for roots, coco fiber acts like a wick. It pulls moisture from the soil and exposes it to the air, causing it to evaporate at an accelerated rate from all sides of the basket, not just the top surface. This 360-degree evaporation is why a coco-lined basket can dry out hours faster than a solid plastic pot in the same conditions. Fortunately, you don’t have to discard these liners; you can engineer them to retain water effectively.
The solution is to create a waterproof barrier inside the liner, turning it from a sieve into a reservoir. By lining the coco fiber with a thin, flexible plastic sheet—like a recycled shopping bag or dry cleaner bag—you immediately stop the lateral water loss. The key is to then poke several drainage holes in the bottom of the plastic to prevent waterlogging during heavy rain, maintaining that crucial balance between moisture retention and drainage. For an even greater upgrade, adding pieces of cut-up cellulose kitchen sponge to the potting mix creates mini-reservoirs that absorb excess water and release it back to the roots as the soil begins to dry.
Your Action Plan: The Coco Liner Water-Retention Hack
- Line the Interior: Place a recycled plastic sheet (like a shopping bag) inside the coco liner, pressing it against the sides.
- Create Drainage: Use scissors or a sharp tool to poke 5-6 strategic drainage holes through the plastic at the very bottom of the basket.
- Ensure a Smooth Fit: Cut a few vertical slits (« darts ») in the plastic from the top edge downwards. This allows the sheet to conform to the bowl shape without bunching up.
- Build Reservoirs: Add a layer of cut-up cellulose sponge pieces to the bottom of the lined basket, and mix more pieces throughout your potting soil.
- Integrate Nutrients: Before filling, mix slow-release fertilizer granules directly into your fresh potting soil to counteract nutrient loss from watering.
While modifying a coco liner is highly effective, it’s also useful to know the other options available, each with its own trade-offs between water retention, aesthetics, and cost. Understanding these alternatives allows you to choose the perfect foundation for your hanging basket ecosystem.
The following table provides a clear comparison of common liner materials, highlighting their performance in key areas. According to a comparative analysis of liner materials, there is a significant difference in water retention capabilities.
| Liner Type | Water Retention | Durability (Seasons) | Cost | Key Advantages | Key Drawbacks |
|---|---|---|---|---|---|
| Standard Coco Liner | Low – Rapid evaporation | 1-2 seasons | $ | Natural appearance, breathable | Dries quickly, birds pull fibers |
| Fabric Liners (Polypropylene) | High – Superior retention | 3+ seasons | $$ | Reusable, bird-proof, retains moisture well | Less natural aesthetic |
| Sphagnum Moss (Thick Layer) | Very High – Sponge-like | 2-3 seasons | $$$ | Excellent moisture retention, rustic look | Expensive, environmental concerns, requires pre-wetting |
| Plastic Insert | Maximum – No evaporation | 5+ seasons | $ | Cheapest, longest-lasting, complete water control | No breathability, unattractive, requires drainage holes |
| Landscaping Fabric | Moderate-High | 3-4 seasons | $ | Durable, inexpensive, customizable | Requires fastening, less attractive than natural options |
How to Mix Trailers and Fillers for a Perfect Sphere Shape?
Creating that stunning, perfectly round « ball of flowers » is an art of three-dimensional planting. It goes beyond the classic « thriller, filler, spiller » formula used for pots. For a hanging basket, you need a central upright plant (the thriller), several mounding plants to create the upper hemisphere (fillers), and a generous number of cascading plants (trailers or spillers) planted around the edge and, crucially, through the sides of the basket. This side-planting technique is the secret to achieving a full, spherical shape, as it ensures flowers and foliage cover the entire basket, not just the top.
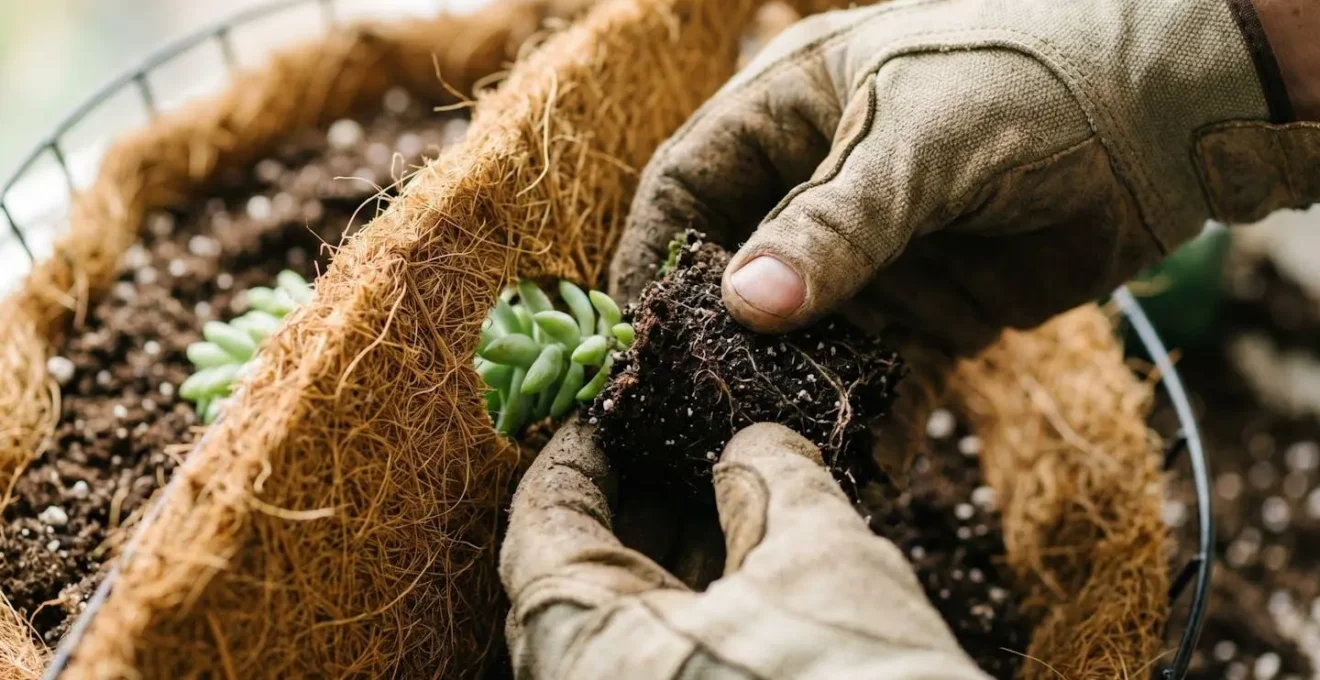
To side-plant, simply cut small ‘X’ shaped slits in your liner (whether it’s coco fiber or a fabric alternative) as you fill it with soil. At each layer, gently feed the root ball of a small trailing plant from the outside in, so the foliage hangs down. The most critical factor for a low-maintenance basket, however, is to group plants by their water requirements. Mixing a drought-loving Portulaca with a moisture-hungry Impatiens is a recipe for disaster, as one will always be either over or under-watered. Sticking to plants with similar water needs ensures they thrive together as a cohesive unit.
Here are three proven plant recipes, grouped by their environmental and water needs, to help you design a harmonious and water-wise spherical basket:
- Full-Sun Sphere Recipe: Combine drought-tolerant Portulaca (center filler), Dichondra ‘Silver Falls’ (trailer), and Lantana (mounding accent). All these varieties thrive with similar low-to-moderate water needs.
- Part-Shade Sphere Recipe: Pair moisture-loving Impatiens (filler), Creeping Jenny (trailer), and Begonias (accent). All prefer consistently moist soil and will appreciate a more sheltered location.
- Shade-Tolerant Sphere Recipe: Use Coleus (colorful filler), Torenia (compact filler/trailer), and English Ivy (slow trailer). All adapt well to lower light and moderate water levels.
Chain or Rope: Which Suspension Material Withstands Wind Better?
The choice between a metal chain and a natural rope for hanging your basket involves more than just aesthetics; it’s a strategic decision in your battle against the elements, particularly wind. Wind is a major adversary for hanging baskets, not just because of the physical stress it places on the hook and support structure, but because it drastically accelerates moisture loss. In fact, vertical gardening experts state hanging baskets can need watering twice a day on hot or windy days, turning a gentle breeze into a powerful dehydrator.
A galvanized steel chain is superior in terms of pure strength and durability. It won’t degrade in the sun or rot from moisture. More importantly, its linked structure allows the basket to rotate freely in the wind. This rotation can help dissipate some of the force, preventing the basket from swinging violently in one direction and potentially breaking its mooring. For very heavy or large baskets in exposed locations, a chain is the most secure option.
A natural fiber rope (like jute or sisal) or a synthetic nylon rope offers a different kind of advantage: shock absorption. The slight elasticity of a rope can help dampen the jarring motions from strong gusts of wind. However, natural ropes are susceptible to rot and UV degradation, requiring replacement every season or two. Synthetic ropes last longer but can become brittle over time. If using rope, the key is to use a thick diameter and inspect it regularly for fraying. For ultimate wind resistance, a hybrid system using a short length of chain connected to a spring or a rubber « snubber » (used in boating) can provide the best of both worlds: strength and shock absorption.
The Nutrient Deficiency Mistake That Yellows Hanging Leaves
If the leaves on your hanging basket are turning yellow despite consistent watering, the problem is likely not water, but food. The very act of frequent watering, which is essential for suspended containers, creates a secondary problem: nutrient leaching. Every time you water your basket until it drains, you are washing away vital soluble nutrients like nitrogen from the soil. Nitrogen is mobile in soil and essential for green, leafy growth. Its absence is the most common reason for yellowing leaves (chlorosis), especially on the older, lower foliage of the plant.
This rapid depletion means that standard potting mix, even high-quality brands, can become nutritionally barren within a few weeks. Relying solely on the initial soil is a common mistake that leads to weak, pale, and underperforming plants. To maintain a lush, green basket, you must implement a proactive feeding strategy that constantly replenishes these lost nutrients. This can involve incorporating slow-release fertilizer into the soil mix from the start and supplementing with a regular liquid feed throughout the growing season. Identifying the specific type of yellowing is also crucial for accurate diagnosis.
This diagnostic table, based on information from horticultural experts at university extension programs, can help you pinpoint the exact nutrient deficiency based on where and how the yellowing appears on your plants.
| Deficiency Type | Location on Plant | Yellowing Pattern | Additional Symptoms | Most Common in Containers |
|---|---|---|---|---|
| Nitrogen (N) | Older/Lower Leaves First | Uniform yellowing spreading from older to younger leaves | Stunted growth, pale green entire plant | Very Common – N leaches rapidly with frequent watering |
| Iron (Fe) | New/Young Leaves | Yellowing between green veins (interveinal chlorosis) | Leaf veins remain distinctly green, new growth affected | Common – caused by high pH water or soil |
| Magnesium (Mg) | Older Leaves | Marbled or mottled yellowing, green veins with yellow patches | Leaf edges may curl upward, interveinal patterns | Moderate – occurs in high-K fertilizer situations |
| Potassium (K) | Older Leaves | Yellowing and browning at leaf margins/edges | Leaf edges show necrotic (dead) brown tissue | Less Common – but occurs with imbalanced feeding |
To combat this constant leaching, the most effective strategy is to create a self-fertilizing soil mix from the outset. This involves layering different types of nutrients that release at different rates, providing a steady supply for the entire season.
When to Prune Hanging Baskets to Trigger a Second Flush?
By mid-summer, even the most well-cared-for hanging basket can start to look tired and leggy. Trailing plants become long and stringy with flowers only at the tips, and the overall shape loses its lush, full appearance. This is a natural part of the plant’s life cycle, but it’s not the end of the show. A strategic, hard prune—often called the « summer haircut »—can shock the plants into a vigorous second flush of growth, resulting in a display that looks fresh and full well into the autumn.
The key is timing. Pruning too early can sacrifice peak blooms, while pruning too late won’t give the plants enough time to recover and re-flower. For most regions in the Northern Hemisphere, the ideal window for this rejuvenation is late July. According to container gardening specialists, pruning hanging baskets in late July guarantees a spectacular late-season show. This may seem drastic, as you will be cutting off existing flowers, but it redirects the plant’s energy from maintaining long stems to producing new, bushy growth and a dense canopy of fresh blooms.
The technique involves cutting back trailing plants like petunias and verbena by at least half their length. For mounding fillers, trim them back by about a third to encourage a more compact shape. This hard prune must be immediately followed by a robust recovery protocol to provide the plants with the energy they need to bounce back quickly. A full-strength dose of liquid fertilizer and consistent moisture are non-negotiable for success.
- Immediate Action: Apply a balanced liquid fertilizer at full strength immediately after pruning to fuel new growth.
- Water Deeply: Soak the basket thoroughly until water drains from the bottom to ensure roots receive the fertilizer and moisture.
- Maintain Consistent Moisture: Check soil daily for the first week post-pruning; keep it evenly moist but not waterlogged.
- Reduce Sun Exposure: If possible, move the basket to a spot with part-shade for 2-3 days after the prune to reduce stress during recovery.
- Monitor New Growth: You should expect to see new shoots within 7-10 days. Once new growth is evident, resume your regular feeding schedule.
How to Pin Ivy to Masonry for Even Coverage?
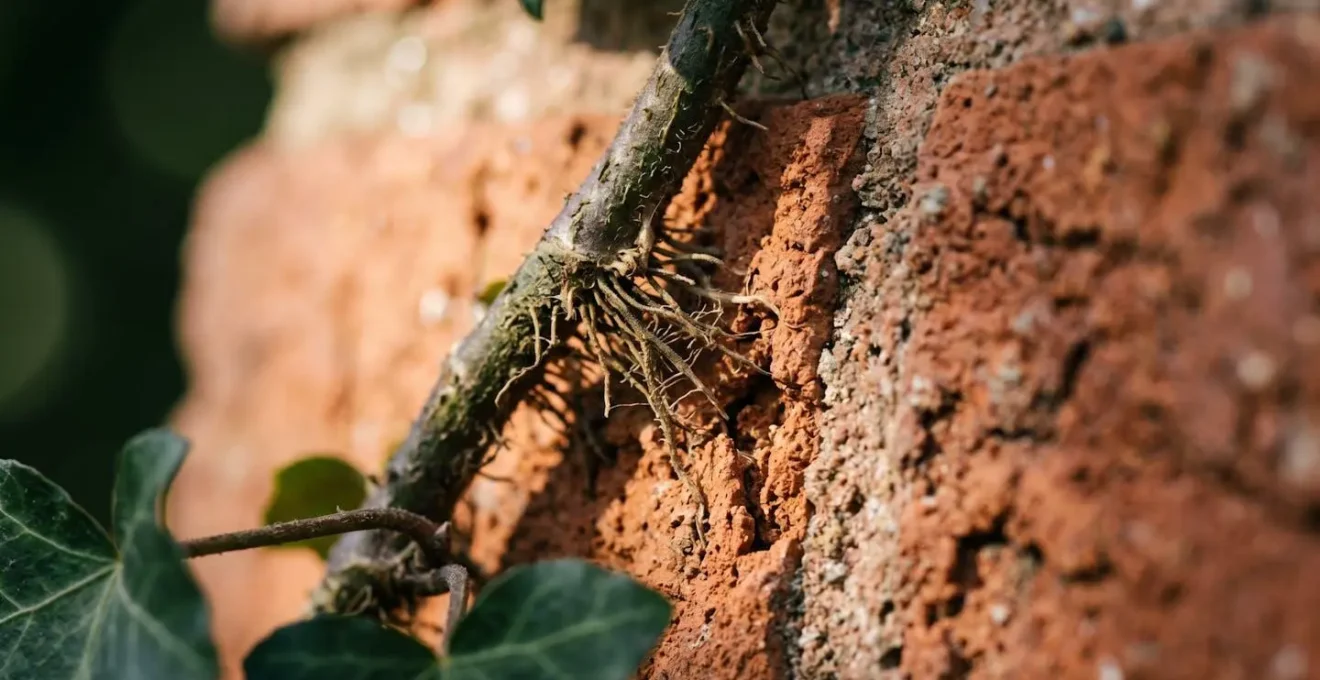
While often used in hanging baskets, ivy’s true gravity-defying potential is revealed when it’s trained to climb. Transforming a bare masonry wall into a living green tapestry requires some initial guidance to ensure even, dense coverage. English Ivy and similar climbing varieties don’t need permanent support; they have a remarkable biological mechanism for clinging to surfaces. They produce aerial rootlets—tiny, hair-like roots that grow from the stem and exude an adhesive substance that allows them to firmly attach to porous surfaces like brick, stone, and mortar.
The mistake many gardeners make is assuming the ivy will spread evenly on its own from the start. Initially, the long runners will often hang down or bunch together, leaving large bare patches on the wall. « Pinning » is the process of manually directing these runners to create a balanced framework. You can use small masonry nails, lead-headed nails, or specialized wall clips to gently tack the ivy stems against the wall in your desired pattern—think of it as drawing a roadmap for the plant’s growth. Space the runners evenly, both horizontally and vertically. Once the ivy is established and its own aerial rootlets have taken hold, these temporary pins can often be removed.
The goal is simply to hold the stem in contact with the masonry long enough for its natural attachment system to engage. As the « Container Gardening Expert Resource » from Side Planting Techniques Guide points out:
English Ivy uses aerial rootlets that will cling on their own once established, but need initial guidance
– Side Planting Techniques Guide, Container Gardening Expert Resource
This initial scaffolding ensures the final result is a uniform curtain of green, rather than a few tangled strands. It’s a perfect example of working with the plant’s natural tendencies to achieve a specific design goal.
How to Deadhead Petunias to Get 3 More Months of Color?
Deadheading—the simple act of removing spent flowers—is one of the most effective ways to prolong the blooming season of plants like petunias. However, there’s a right way and a wrong way to do it. The common mistake is to simply pluck off the colorful, wilted petals. While this tidies up the plant, it leaves behind the most important part: the calyx, or the small green cup at the base of the flower where the seed pod will form. When the calyx remains, the plant receives the signal to stop flowering and divert its energy into seed production. This is the single biggest reason why petunia baskets stop blooming prolifically mid-season.
The correct technique involves pinching or cutting the stem *below* the calyx, removing the entire spent flower structure. This simple change in technique prevents seed formation and forces the plant to redirect its energy back into producing new buds and flowers. This can extend the blooming period by two to three months under optimal conditions.
The Calyx Removal Technique: Why Pinching Below the Flower Matters
Deadheading petunias correctly requires removing not just the faded flower but the entire seed-producing structure. When you simply pluck off the wilted bloom, the calyx (the small green cup at the flower base) remains attached and immediately begins forming a seed pod. This seed production signals the plant to stop flowering and focus energy on seed maturation. The proper technique involves pinching or cutting below the calyx, removing the entire spent flower structure down to the next leaf node or side shoot. This prevents seed formation and redirects the plant’s energy into producing new flower buds rather than seeds, extending the blooming period by 2-3 months in optimal conditions.
For gardeners who want to engineer a truly low-maintenance system, the ultimate solution is to choose plants that don’t require deadheading at all. Plant breeders have developed remarkable « self-cleaning » varieties that are genetically programmed to drop their spent blooms before they can form seeds, ensuring a continuous display of color with minimal effort. While they may cost slightly more initially, they save hours of maintenance time.
- Wave Series Petunias: Ground-breaking trailing petunias that naturally drop spent blooms without forming seed pods.
- Supertunias: Vigorous trailing varieties bred for continuous blooming with minimal maintenance and a self-cleaning habit.
- Surfina Petunias: Similar performance to Supertunias with exceptional weather resistance and automatic bloom drop.
- Calibrachoa (Million Bells): A close relative of the petunia that never needs deadheading and blooms prolifically all season.
Key Takeaways
- The biggest cause of dry hanging baskets is the wicking effect of standard coco liners; modifying them with a plastic barrier is the most impactful first step.
- Grouping plants with similar water requirements and using side-planting techniques are essential for creating a healthy, aesthetically pleasing spherical shape.
- Frequent watering leaches nutrients rapidly. A proactive feeding strategy with slow-release fertilizers and liquid supplements is non-negotiable for season-long health.
How to Transform a Small Balcony into a Private Green Sanctuary?
Applying all these principles—liner engineering, water-wise plant grouping, strategic feeding, and proper maintenance—transforms the conversation from « how to keep one basket alive » to « how to create an entire green sanctuary. » A small balcony can become a private, lush oasis by layering these high-performance hanging baskets with railing planters and floor containers. This vertical, multi-layered approach not only maximizes a small footprint but also creates an incredibly effective living privacy screen.
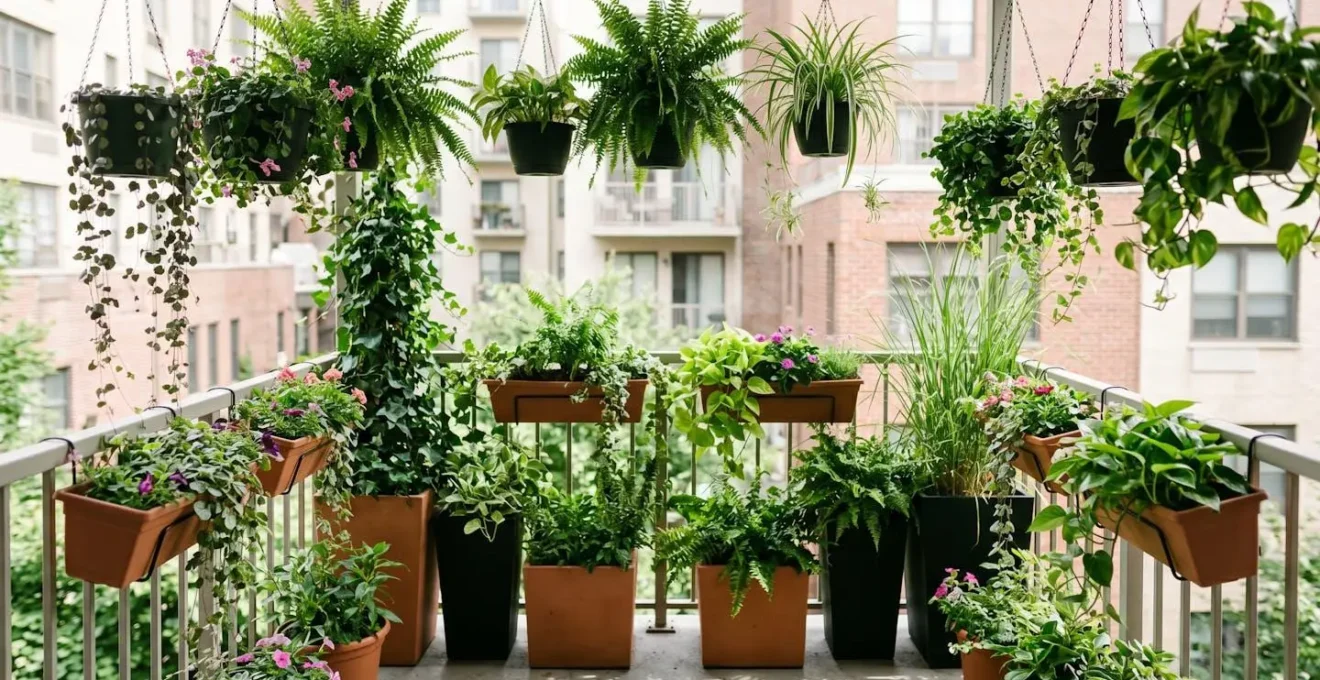
The true magic happens when these individual planters begin to work together as a single, self-regulating ecosystem. When multiple plants are clustered in a small space, they create a beneficial microclimate. This phenomenon, known as transpiration clustering, is the ultimate reward for your engineering efforts. As each plant releases water vapor through its leaves (transpiration), the ambient humidity in the immediate area rises. This humid bubble shields the entire plant community from drying winds and slows the rate of evaporation from the soil surface.
Creating a Microclimate: How Plant Clustering Reduces Watering
When multiple hanging baskets and planters are positioned close together on a balcony, they create a beneficial microclimate that significantly reduces individual watering needs. In a study comparing isolated hanging baskets to clustered arrangements, the grouped plants collectively maintained 15-20% higher ambient humidity within their immediate zone. This humid envelope shields plants from drying winds and slows evaporation rates from soil surfaces. The physical mass of foliage also acts as a windbreak. The result is a self-regulating system where clustered containers can reduce overall watering frequency by approximately 40% compared to isolated containers in the same location, promoting more vigorous growth due to the stable, humid environment.
This is the ultimate expression of gravity-defying, problem-solving gardening. By moving beyond treating symptoms and instead engineering a cooperative system, you create a beautiful, resilient, and far less demanding green space. Your balcony becomes more than just a place for pots; it becomes a thriving, living sanctuary.
Start today by re-evaluating your existing containers not as passive pots, but as systems waiting to be optimized. Engineer your own water-wise ecosystem and transform your small space into the lush, private green sanctuary you’ve always envisioned.