Contrary to popular belief, the perfect « effortless » wildflower bouquet is a masterpiece of hidden engineering, not a happy accident.
- True wild style relies on structural mechanics like the spiral technique and chicken wire, not just random placement.
- Vase life is determined by scientific pre-treatment, including stem cauterization and precise cutting times, not just fresh water.
Recommendation: Ditch the idea of « natural » as « unstructured » and instead master the professional techniques that create the illusion of wild, untamed beauty in your arrangements.
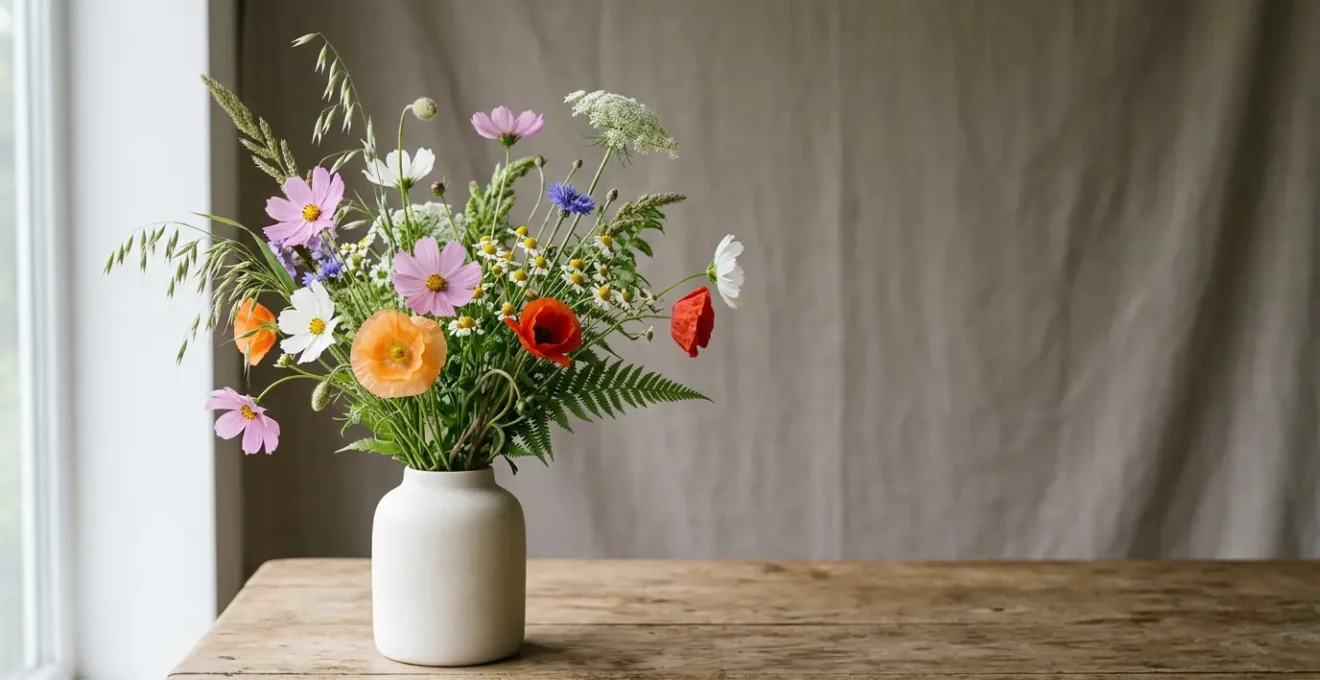
There’s a romantic allure to a freshly gathered wildflower bouquet—a vibrant, untamed slice of the meadow brought indoors. For gardeners and nature lovers, the goal is to capture that breezy, natural feeling without creating a stiff, formal arrangement. We often see images of these beautiful, loose bouquets and think, « I can do that. » We head out, snip what’s beautiful, and place it in a jar, only to find a tangled, short-lived mess that droops within hours.
The common advice is often too simplistic: « gather a mix of flowers, » « use different textures, » « be creative. » This advice misses the crucial point that separates an amateur bundle from a piece of deconstructed elegance. The secret isn’t in what you pick, but in how you handle, treat, and structure it. It involves a level of professional consideration that happens long before the stems touch water, from bug quarantine protocols to understanding the physics of volume.
But what if the key to that perfectly « wild » look wasn’t less structure, but a different, invisible kind of structure? This guide moves beyond the basics to reveal the expert techniques that underpin the most beautiful, naturalistic arrangements. We will deconstruct the myth of the effortless bouquet by exploring the essential science and mechanics behind it. We will cover the foundational spiral technique, advanced conditioning for delicate blooms, the art of creating movement, and the modern, foam-free mechanics that define the organic look.
This article provides a roadmap to mastering that professional-yet-wild aesthetic. Below, you will find a structured guide to the key techniques and considerations that will elevate your garden-to-vase creations from simply pretty to truly breathtaking.
Table of Contents: A Guide to Mastering the Wild Bouquet
- Why Is the Spiral Technique Essential for Loose Bouquet Volume?
- How to Stop Poppies and Cosmos from Wilting in an Hour?
- Ferns or Grasses: Which Filler Adds More Movement to Wild Bouquets?
- The Bug Infestation Mistake When Bringing Garden Flowers Indoors
- When to Cut Wildflowers for Maximum Vase Life?
- The Weed or Flower Debate: Using Roadside Grasses in High-End Design
- Where to Find Legal and Safe Wild Materials for Your Home?
- How to Achieve the Organic Modern Look Without Using Floral Foam?
Why Is the Spiral Technique Essential for Loose Bouquet Volume?
The single most important skill for achieving a full, airy, and stable wild bouquet is not an artistic eye, but a technical hand: mastering the spiral. Many beginners simply bunch stems together vertically, which results in a tight, constricted arrangement where flowers compete for space and water. The spiral technique is the foundational floral mechanic that creates a self-supporting structure, allowing each stem to have its own space while contributing to a voluminous, graceful whole. It’s the hidden architecture behind that coveted « just-gathered » look.
The magic is in the physics. By adding each stem at a consistent diagonal angle and rotating the bunch, you create a vortex-like structure at the binding point. This allows the stems to lock into place, supporting each other’s weight. A properly spiraled bouquet has a strong internal framework that gives it a beautiful, open dome shape and, remarkably, allows it to stand on its own before it even goes into a vase. This stability means you can create much looser, more dynamic designs without them falling apart. It’s the difference between a dense clump and a dancing constellation of flowers.
To master it, start with a few focal flowers and add subsequent stems—whether foliage, fillers, or more blooms—at a consistent 45-degree angle. Hold your grip loosely with your non-dominant hand, using just your thumb and index finger. After adding each stem, give the bouquet a quarter turn. This rotation is key to maintaining the spiral pattern. As you build, the stems will naturally form a lattice below your hand, creating the volume and airiness that is the hallmark of a professional loose bouquet. Once complete, the binding point where you tie it off will be a neat, strong intersection of all your angled stems.
How to Stop Poppies and Cosmos from Wilting in an Hour?
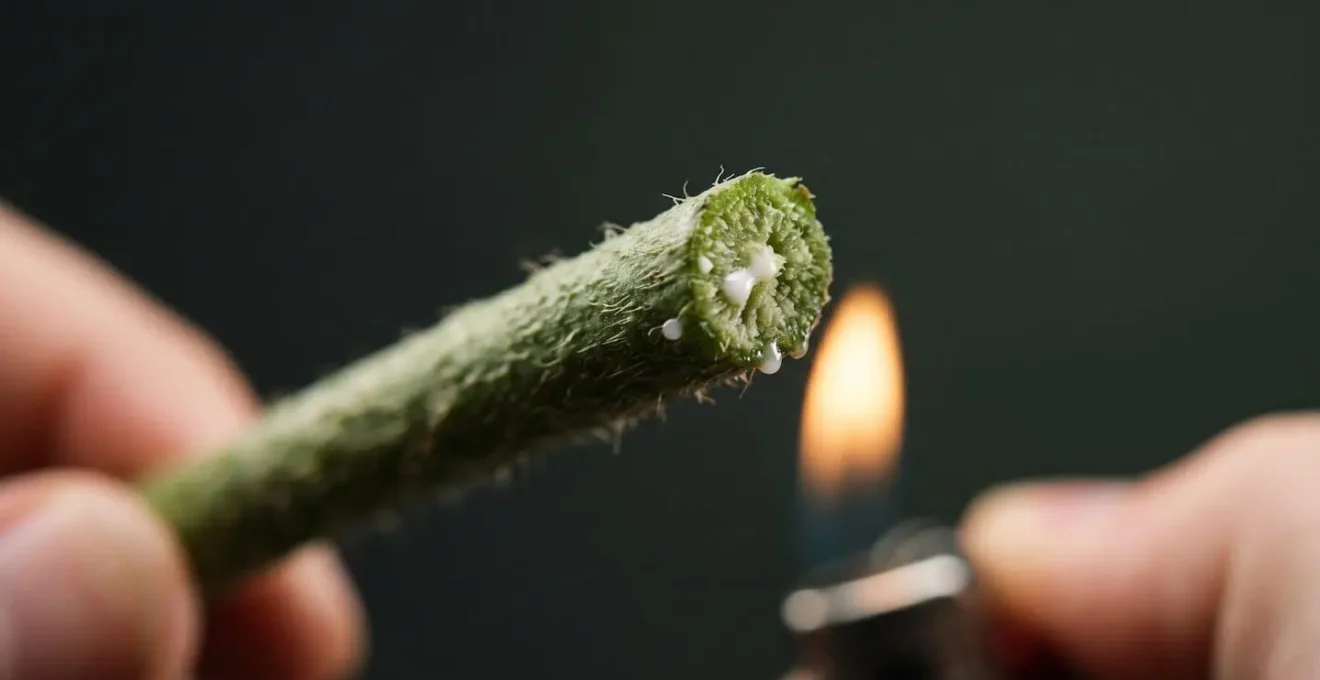
You’ve created a beautiful arrangement, but an hour later, the delicate heads of your poppies and cosmos are drooping sadly. This is the heart-sinking moment that separates novices from experts. The key isn’t what you do after they wilt, but the crucial stem triage you perform the moment they are cut. Flowers like poppies, dahlias, and hellebores have milky or sticky sap that clogs their stems when cut, preventing them from absorbing water. For these delicate beauties, a simple snip and plop into water is a death sentence. You must seal the cut to ensure hydration.
The most effective method is cauterization. Immediately after cutting, briefly expose the very tip of the poppy stem to a flame (from a lighter or candle) for about 2-3 seconds until it turns dark. This singes the end, stopping the sap flow and allowing the stem to drink freely. Alternatively, you can dip the cut end into an inch of just-boiled water for 7-10 seconds. This process dramatically extends their vase life. With proper conditioning, you can expect a vase life of 2 to 5 days or more for your poppies, rather than just a few hours of glory.
For other flowers that wilt quickly due to water stress, like cosmos or hydrangeas, a full-submersion « ICU » bath can work wonders. If a flower looks droopy, re-cut the stem at an angle and submerge the entire flower—stem, leaves, and head—in a basin of cool water for 30-60 minutes. This allows the plant to absorb water through its petals and leaves, rapidly rehydrating it. This intensive care can often bring a flower back from the brink, restoring its turgidity and saving your arrangement.
Ferns or Grasses: Which Filler Adds More Movement to Wild Bouquets?
A wild bouquet is a story told in motion. It’s not just about color and texture, but about the dynamic energy the arrangement conveys. The choice of filler greenery is where you become a choreographer, deciding whether the bouquet will feel like a tranquil, shady woodland or a windswept, sunny meadow. The two primary actors for this are ferns and grasses, and each creates a distinct movement narrative. They are not interchangeable; choosing one over the other is a deliberate design decision that defines the bouquet’s personality.
Ferns, with their soft, layered fronds, create a gentle, cascading movement. They tend to drape and flow downwards, spilling over the edge of the vase. This adds a sense of lushness, elegance, and calm. Think of the quiet feeling of a forest floor. They are perfect for grounding an arrangement and adding a soft, romantic feel, best positioned in the lower third and along the perimeter to create that graceful drape.
Grasses, in contrast, provide an energetic, upward, and vibrating movement. Their linear, architectural form dances and sways, bringing a feeling of wild spontaneity and airiness, like an open field touched by the wind. Varieties like wild oats or fescues are best placed in the upper portions and extending from the perimeter, where their fine textures can catch the light and create a sense of height and lightness. They are the key to achieving a truly untamed, dynamic look. The choice isn’t about which is « better, » but which story you want your bouquet to tell.
This comparative table breaks down the distinct character each element brings to your arrangement, helping you choose the right « dancer » for your floral choreography.
| Characteristic | Ferns | Grasses |
|---|---|---|
| Movement Type | Cascading, draping, flowing downward | Vibrating, dancing, windswept upward |
| Visual Narrative | Quiet woodland floor, shaded forest scene | Open sunny meadow, dynamic field |
| Texture Quality | Soft, layered fronds with gentle curves | Linear, architectural with jagged edges |
| Best Positioning | Lower third and edges for drape effect | Upper portions and perimeter for height |
| Design Mood | Calm, contemplative, elegant | Energetic, wild, spontaneous |
| Color Palette | Deep greens, forest tones | Wheat, gold, silver-green tones |
The Bug Infestation Mistake When Bringing Garden Flowers Indoors
One of the less romantic aspects of creating wildflower bouquets is the hitchhikers they bring with them. Nothing ruins the charm of a rustic arrangement faster than finding a trail of ants on your dining table or a small beetle crawling up the wall. A common mistake for beginners is to bring their freshly cut beauties straight from the garden to the vase, inadvertently introducing a host of insects into their home. A professional knows that a simple, three-step de-bugging process is a non-negotiable part of conditioning.
First is The Shake. Before you even think about coming inside, hold each stem or a small bunch upside down and give it a gentle but firm shake. This will dislodge most of the larger, surface-level insects like beetles and spiders without damaging the delicate blooms.
Next comes The Dunk. Prepare a bucket of cool, clean water. Briefly submerge the flower heads into the water. This gentle bath will encourage any smaller, more persistent bugs like aphids or thrips to float off the petals and leaves. It’s a much kinder and more effective method than trying to blast them off with a spray of water, which can bruise the flowers.
Finally, and most importantly, is The Quarantine. After shaking and dunking, place your conditioned flowers in their bucket in a separate, cool space like a garage, mudroom, or sheltered porch for about an hour. If possible, leave a door or window open. Many insects, particularly beetles, are naturally drawn to light and will leave the flowers and head for the exit. This simple quarantine period is the most effective way to ensure your bouquet is pest-free before it makes its debut indoors, preserving both your arrangement and your peace of mind.
When to Cut Wildflowers for Maximum Vase Life?
The longevity of your bouquet is often decided before the flowers are even in your hand. Cutting at the wrong time of day is one of the most common mistakes, and it can have a drastic impact. As studies on cut flower timing reveal, there can be a 50% reduction in vase life if flowers are cut in the heat of the afternoon. At this time, plants are water-stressed and at their lowest energy point. The secret to a long-lasting arrangement is harvesting when the stems are fully hydrated and packed with sugars from the night’s respiration cycle.
As Rose Edinger of the Brooklyn Botanic Garden highlights, the optimal window is clear:
Early morning is the ideal time to cut fresh flowers. The flowers have had the benefit of cool night air and morning dew. Their stems are filled with water and carbohydrates and so are firm to the touch.
– Rose Edinger, Brooklyn Botanic Garden – Cut-Flower Care Guide
Beyond the time of day, cutting flowers at the correct stage of bloom is equally critical. Harvesting too early means they may never open; too late, and their vase life is already half over. Each flower type has its own ideal cutting stage:
- Multi-bloom stems (e.g., foxgloves, delphiniums): Cut when the bottom 1/3 of the flowers on the stalk are open. The upper buds will continue to open in the vase.
- Single blooms (e.g., zinnias, cosmos): The « wobble test » is your best guide. Hold the stem about 6 inches below the flower and gently shake it. If the head is floppy, it’s not ready. If the stem feels firm and the head is stable, it’s perfect to cut. Ideally, the bud should be colored and just starting to unfurl.
- Poppies: Cut these at the « cracking bud » stage, when the green casing has split and you can just see a sliver of petal color inside. They will open dramatically in the vase.
- Hydrangeas: Wait until the petals feel slightly papery or leathery to the touch while still on the plant. This indicates they have matured enough to last well in a vase.
The Weed or Flower Debate: Using Roadside Grasses in High-End Design
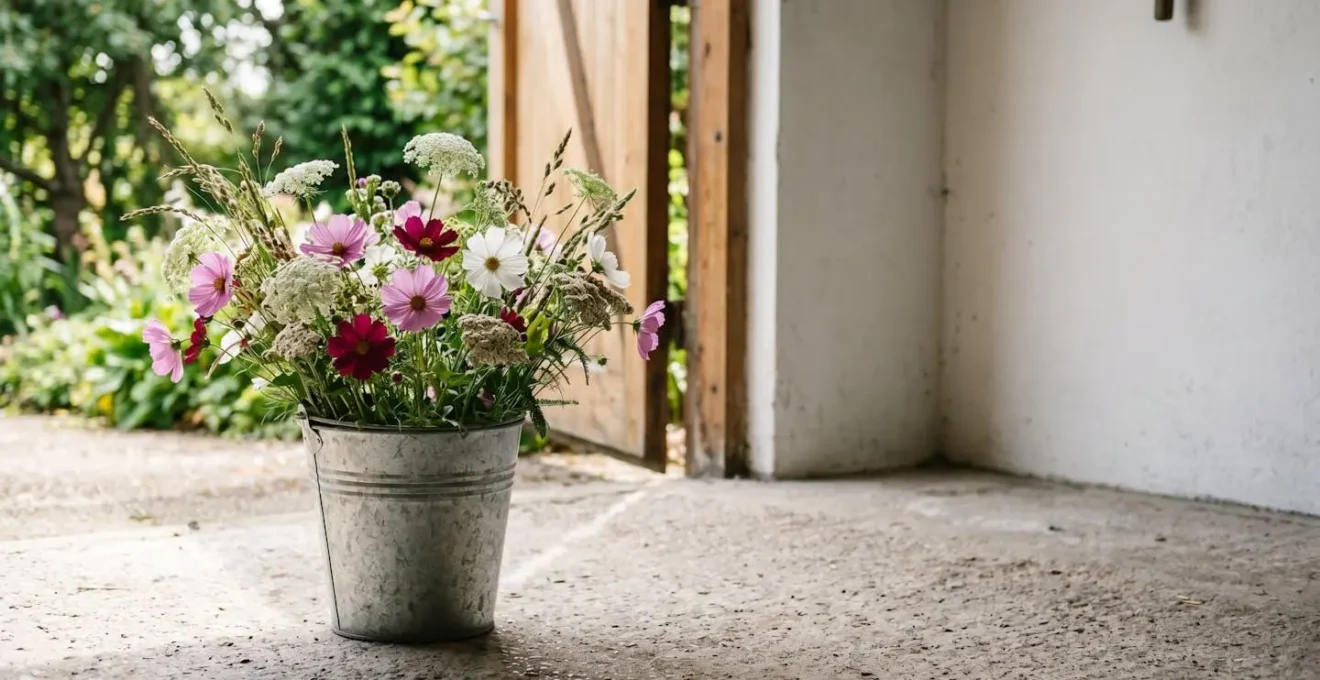
The line between a « weed » and a « flower » is often just a matter of perspective and intention. For the savvy designer, the verges of country lanes and the edges of meadows are a treasure trove of textural, dynamic materials that can elevate a bouquet from simply pretty to truly high-end. The practice of curated foraging is about seeing the potential in plants others overlook, like Queen Anne’s lace, goldenrod, and various wild grasses. These elements bring an authenticity and a sense of place that cultivated flowers alone often cannot achieve.
Their « rough » and untamed textures provide a stunning contrast to the more delicate forms of garden blooms, creating visual interest and depth. A spray of wild oats arching gracefully from a cluster of perfect zinnias tells a richer story. The airy, flat-topped clusters of Queen Anne’s lace can act as a delicate « cloud » to support heavier blooms, adding a frothy lightness that is difficult to replicate with traditional fillers. The key is to pair these foraged materials with intention, using them to enhance, not overwhelm, your focal flowers.
Case Study: Queen Anne’s Lace: From Roadside Weed to Design Staple
A New England forager documents the transformation of common roadside ‘weeds’ including Queen Anne’s lace, goldenrod, and hardy fuchsia into sophisticated wildflower arrangements for home decor. By pairing these foraged materials with vintage vessels like antique champagne buckets and milk glass vases, the designer demonstrates how rough, untamed textures of roadside plants can enhance delicate garden blooms through the power of contrast. The arrangements achieved a professional aesthetic that rivals high-end floral designs, proving that the designer’s eye can elevate mundane materials into premium decor.
To begin foraging with a designer’s eye, start by learning to identify a few key « desirable weeds » that are both beautiful and hardy in a vase. Yarrow offers long-lasting flat-topped clusters, thistles provide architectural drama (wear gloves!), and the feathery plumes of Common Reed add height and texture that works well both fresh and dried. By learning to see the beauty in these common plants, you unlock a whole new palette for your arrangements.
Where to Find Legal and Safe Wild Materials for Your Home?
The appeal of using foraged materials is undeniable, but it comes with a critical responsibility to harvest legally, ethically, and safely. The « wild » in wildflower is not an invitation for a free-for-all. Trespassing on private land or harvesting protected species can lead to fines and damage ecosystems. Furthermore, some of the most beautiful wild plants are also highly toxic to pets and children, turning a lovely bouquet into a household hazard. Before you cut a single stem, you must arm yourself with knowledge.
Ethical foraging is guided by a simple principle: leave the place better than you found it, or at least as you found it. This means never taking more than you need and ensuring the plant population can regenerate. The « 1/10th Rule » is a great guideline: never harvest more than 10% of a particular plant stand in any given area. It’s also vital to respect property boundaries and get permission before foraging on private land. Finally, avoid harvesting from areas that could be contaminated, such as busy roadsides (vehicle exhaust, herbicides) or industrial sites.
Your Action Plan: The Ethical Forager’s Code of Conduct
- Points of contact: Identify plant species with apps (e.g., PlantNet, PictureThis) to know what you are harvesting and check local protected species lists online.
- Collecte: Inventory your foraging locations. Clearly distinguish between public lands, common areas, and private property. Always seek permission for the latter.
- Cohérence: Check your harvest against your needs. Follow the 1/10th Rule—never take more than 10% of a plant stand to ensure its health and regeneration.
- Mémorabilité/émotion: Assess the area for safety. Avoid foraging near heavily trafficked roads, industrial sites, or areas sprayed with herbicides to prevent contamination.
- Plan d’intégration: Use clean, sharp tools to cut stems. Avoid pulling up roots entirely to ensure the plant survives and can regrow.
Equally important is knowing what NOT to bring home. Many common and beautiful wildflowers are dangerously toxic. Foxglove (Digitalis) contains cardiac glycosides and is extremely poisonous if ingested. The sap of Giant Hogweed can cause severe chemical burns when exposed to sunlight. Even the water in a vase holding Lily of the Valley can be lethal to a curious cat. Always confirm the identity of a plant and check its toxicity before bringing it into a home with pets or small children.
Key Takeaways
- The « effortless » wild look is achieved through deliberate structure, not random chance; mastering the spiral technique is fundamental.
- Vase life depends on science: treat delicate stems by searing them and harvest flowers in the early morning at the correct bloom stage.
- Go beyond basic fillers; use ferns for cascading calm and grasses for energetic movement to create a specific mood or « movement narrative. »
How to Achieve the Organic Modern Look Without Using Floral Foam?
For decades, green floral foam was the invisible workhorse of floristry. However, growing awareness of its environmental impact—it’s a non-biodegradable, microplastic-shedding, single-use product—has pushed designers to rediscover more sustainable floral mechanics. For the organic modern look, which celebrates natural forms and materials, ditching foam is not just an ethical choice but an aesthetic one. Foam encourages rigid, static arrangements, while foam-free techniques promote the very movement and airiness we seek in a wild bouquet.
The most versatile and effective foam alternative is simple chicken wire (also known as floral netting). By crumpling a piece of chicken wire into a loose ball and securing it in your vase, you create a supportive matrix with countless placement points. Unlike foam, which forces stems into a single, fixed position, the wire’s grid allows you to place stems at a wide variety of angles. You can easily pull a stem out and reposition it without damaging the mechanics. This freedom is what allows for the creation of gravity-defying, asymmetrical designs that are central to the organic modern aesthetic.
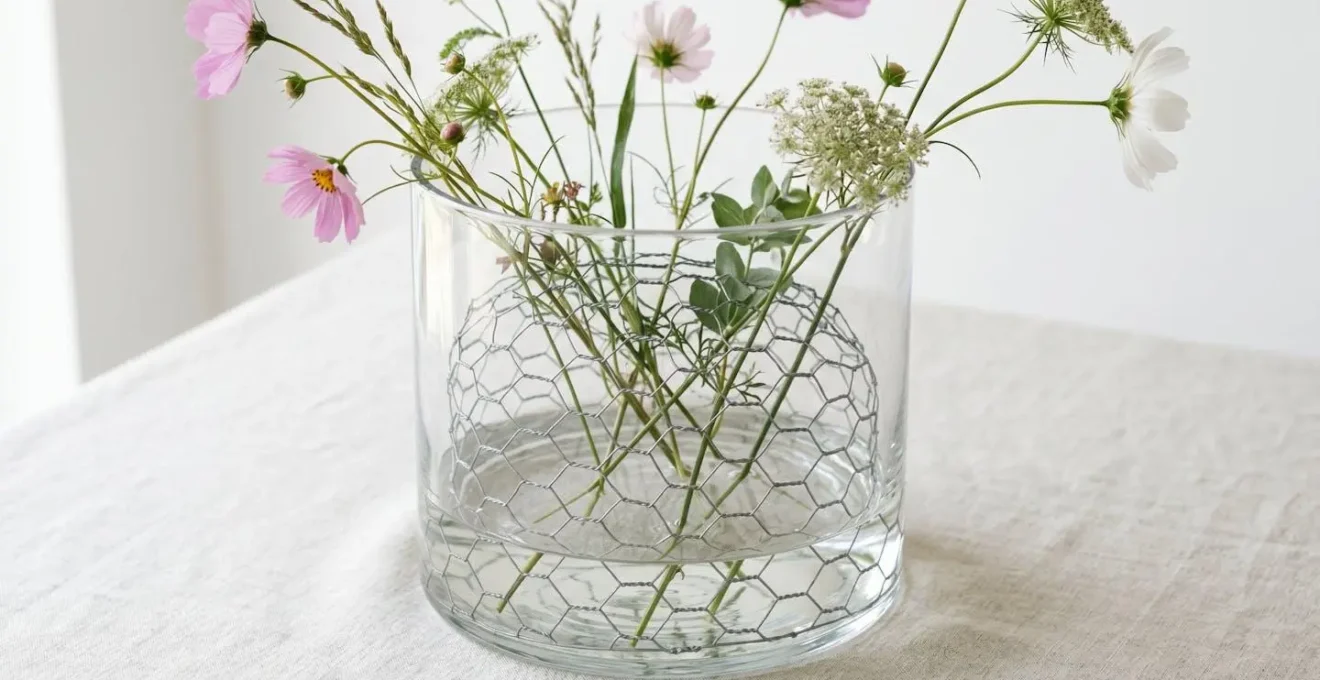
To use this technique, cut a piece of chicken wire about one and a half times the diameter of your vase opening. Crumple it into a ball and fit it snugly into the vase, securing it with a cross-hatch of waterproof floral tape across the rim. The wire provides the structure, allowing stems to be anchored firmly while appearing to float freely. This method not only provides superior creative control for loose, airy designs but is also completely reusable, making it a cornerstone of the modern, environmentally-conscious florist’s toolkit.
Start today by choosing one of these techniques to practice. Don’t aim for perfection on the first try; instead, focus on understanding the mechanics. Grab some chicken wire for your next vase, practice the wobble test on your garden zinnias, and see the difference that professional intention can make in your « wild » creations.