In summary:
- Transforming basic flowers into professional-looking arrangements relies on understanding a few core scientific principles and mechanical techniques, not expensive tools.
- Proper hydration is more than just water; it’s about preventing air blockages in the stems and using a balanced floral food formula.
- The structure and shape of your arrangement are determined by hidden « mechanics » like tape grids or chicken wire, which give you control over every stem.
- Applying timeless design rules, like the Golden Ratio, is the secret to creating visually harmonious and naturally beautiful bouquets.
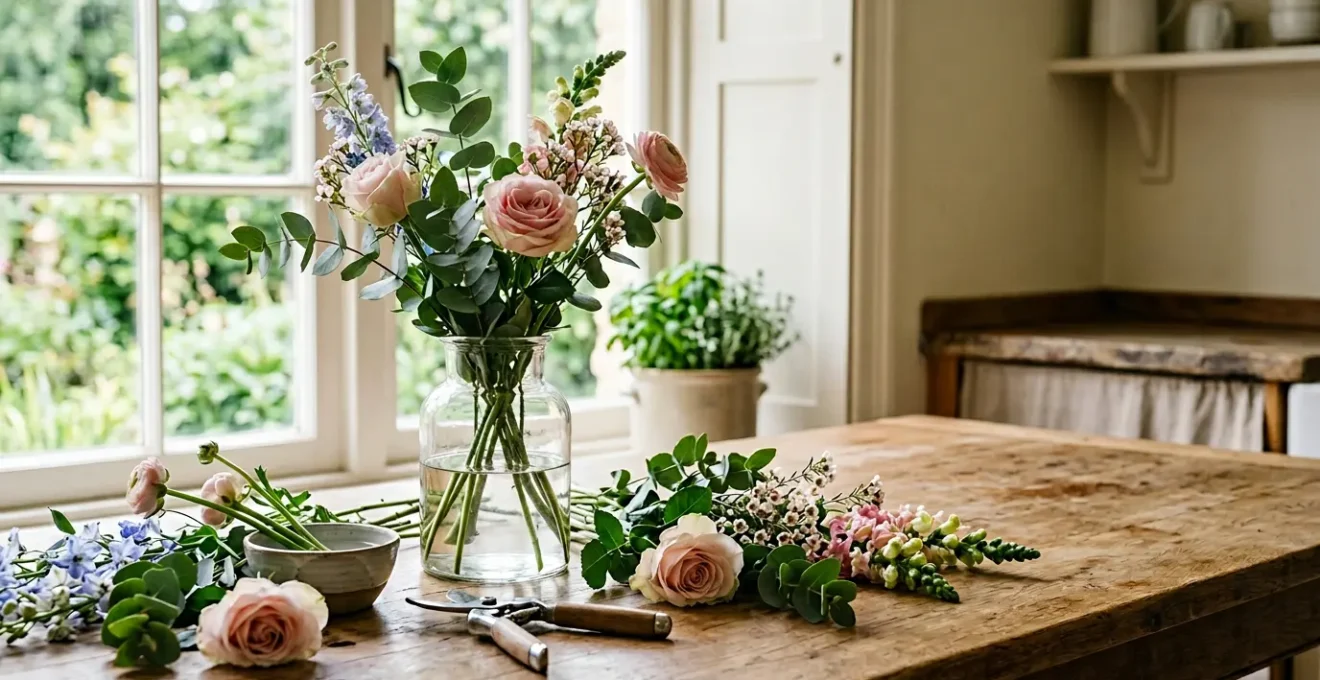
You bring home a vibrant bunch of flowers from the supermarket, full of creative potential. You trim them, place them in a vase, and… they either flop over, look sparse, or start wilting within a day. It’s a common frustration that makes professional floral design feel like an unattainable, expensive art form. Many believe the secret lies in costly courses or exotic, hard-to-find blooms. The conventional advice is often limited to « change the water » or « use the little packet, » without explaining the crucial principles that make a real difference.
But what if the key to lush, long-lasting, and beautifully structured arrangements wasn’t about spending more money, but about understanding the simple science the pros use every day? What if you could unlock that next level of skill by mastering the ‘why’ behind the basic ‘how’? The real magic happens when you move beyond just following rules and start understanding the principles of hydration, structural mechanics, and natural composition. This isn’t about buying better flowers; it’s about becoming a better floral designer with the flowers you already have access to.
This guide is designed to be your self-taught masterclass. We will deconstruct the foundational techniques that florists rely on, turning abstract concepts into practical, actionable steps. From the science of keeping stems hydrated to the structural secrets for perfect placement and the timeless rules of aesthetic balance, you’ll gain the confidence to turn any bunch of flowers into a personal work of art that truly lasts.
In this comprehensive guide, we’ll explore the core pillars of professional floral arranging, giving you the knowledge to elevate your skills immediately. The following sections are designed to build upon each other, starting with the foundational science of flower care and moving toward the artistic principles of design.
Summary: The A-Z of At-Home Professional Floral Arranging
- Why Cutting Stems Underwater Changes Everything for Hydration?
- How to Create a Grid with Tape for Perfect Stem Support?
- Scissors or Knife: Which Tool Prevents Stem Crushing Effectively?
- The Sugar Myth That Causes Bacteria Growth in Your Vase
- When to Buy Flowers to Ensure Peak Bloom on Party Day?
- Every 2 Days or 3:Why Do Bespoke Bouquets Create Stronger Emotional Connections Than Premade Ones?
- Why Is Chicken Wire the Secret to Airy, Organic Arrangements?
- How to Apply the Golden Ratio to Your Home Floral Arrangements?
Why Cutting Stems Underwater Changes Everything for Hydration?
The single most common reason a freshly cut flower wilts prematurely has nothing to do with the water in the vase, but with the air that gets inside its stem the moment you cut it. Think of a flower’s stem as a bundle of tiny straws—its vascular system, or xylem—designed to suck up water. When you cut a stem in the open air, a tiny air bubble, called an air embolism, can get sucked into the base. This bubble creates a blockage, effectively preventing water from reaching the bloom, no matter how much water is in the vase. The flower is literally dying of thirst.
Cutting stems underwater, or immediately placing them in water after cutting, prevents this from happening. The stem’s first « drink » is water, not air, ensuring an unbroken column of hydration from the vase all the way to the petals. This simple technique is non-negotiable for professional florists, especially for notoriously thirsty flowers like hydrangeas. The difference is staggering; failing to properly re-cut stems can lead to a 40-60% potential loss of vase life. This isn’t just a helpful tip; it’s the foundational science of flower longevity.
To do this at home, simply fill a sink or a deep bowl with a few inches of cool water. Submerge the bottom part of the stem and make your cut while it’s fully underwater. Keep the stem submerged as you transfer it directly into your prepared vase. This one small change in your routine addresses the root cause of wilting and will have a more significant impact on your flowers’ lifespan than almost any other action.
How to Create a Grid with Tape for Perfect Stem Support?
Have you ever tried to arrange flowers in a wide-mouthed vase, only to have them all slump to the sides, leaving a gaping hole in the middle? This is where understanding floral mechanics comes into play. Mechanics are the hidden structures that provide support and give you control over stem placement. While professionals use various tools, the most accessible, inexpensive, and effective method for any beginner is the simple tape grid.
A tape grid is a web of clear, waterproof floral tape stretched across the opening of your vase. You create a series of parallel strips, then add another series of strips perpendicular to the first, forming a checkerboard pattern. This grid creates small, supportive squares that hold each stem exactly where you place it. It allows you to build height in the center, create graceful arcs on the sides, and ensure your arrangement looks full and intentional from every angle. The key is to use waterproof floral tape (often found in craft stores) as regular tape will lose its adhesion when wet.
This technique is the secret to achieving that coveted « full » look without needing an excessive amount of flowers. It allows you to use negative space effectively and gives even the most delicate stems the support they need to stand tall. Once the arrangement is complete, the clear tape is virtually invisible, hidden by the foliage and blooms at the water line.
While the tape grid is a fantastic starting point, it’s helpful to see how it compares to other common floral mechanics. This understanding allows you to choose the right tool for any vase or design concept you have in mind.
| Mechanic Type | Best For | Pros | Cons | Cost |
|---|---|---|---|---|
| Tape Grid | Wide-mouthed vases | Inexpensive, easy to apply, adjustable pattern | Single-use, visible if not concealed properly | $ |
| Chicken Wire Ball | Medium to large vases | Reusable, allows natural movement, sustainable | Can scratch glass, sharp edges, rust over time | $$ |
| Flower Frog | Shallow bowls, ikebana-style | Reusable, stable, minimal visual impact | Limited to certain vessel types, initial investment | $$$ |
| No Support (Narrow Neck) | Narrow-necked vases | Zero cost, natural look, no setup time | Limited to specific vase shapes, less control | Free |
Scissors or Knife: Which Tool Prevents Stem Crushing Effectively?
The choice of cutting tool might seem like a minor detail, but it has a major impact on a flower’s ability to absorb water. Many beginners reach for standard household scissors, but these often do more harm than good. The primary issue with dull or thick-bladed scissors is that they crush the stem’s vascular tissues as they cut. Instead of a clean opening for water uptake, you’re left with pinched and damaged cells that significantly restrict hydration, undoing all the good work of cutting underwater.
A sharp floral knife or a pair of bypass pruners (where two sharp blades glide past each other like scissors, rather than crushing down like an anvil) is the professional’s choice. These tools create a clean, sharp slice through the stem’s xylem, leaving the water-absorbing channels wide open. This ensures maximum water uptake and extends the life of the bloom. The goal is to make a cut so clean that the stem’s internal structure remains perfectly intact.
This macro photograph clearly shows the clean internal structure of a woody stem after a precise cut with a sharp tool, which is essential for optimal water absorption.

As you can see, the clean slice leaves the vascular system open and ready to hydrate. The right tool depends on the type of stem you’re working with. A general rule is the woodier the stem, the more important a sharp, slicing cut becomes. Using the correct tool for each flower type is a hallmark of professional technique.
- Woody stems (roses, lilacs, hydrangeas): Use a sharp floral knife, craft blade, or quality bypass pruners. Cut at 45-degree angle.
- Medium stems (carnations, chrysanthemums): Use sharp bypass pruners or heavy-duty floral scissors. Cut at 45-degree angle.
- Soft hollow stems (daffodils, tulips, dahlias): Use sharp scissors. Cut horizontally (straight across) for soft-stemmed bulb flowers.
- Tool maintenance is essential: Sharpen blades regularly and clean after each use to prevent crushing stems and spreading disease.
The Sugar Myth That Causes Bacteria Growth in Your Vase
One of the most persistent « home remedy » tips for feeding flowers is to add a spoonful of sugar to the vase water. The logic seems sound: sugar is energy, so it must be good for the flowers. However, this is a dangerous half-truth. While flowers do need sugar (carbohydrates) for energy, adding only sugar to your vase creates the perfect breeding ground for bacteria. The bacteria multiply rapidly, clogging the flower stems and preventing water uptake. In effect, you’re feeding the bacteria more than you’re feeding the flowers, leading to cloudy water, a foul smell, and prematurely dead blooms.
Professional flower food, including the little packet that comes with a bouquet, is a carefully balanced 3-component formula. It’s not just sugar. It contains: 1. Sugar (Food): Provides essential carbohydrates for the blooms to continue developing. 2. Acidifier (Water Uptake): Lowers the pH of the water. Tap water is often slightly alkaline, and a more acidic environment helps the stems absorb water more efficiently. 3. Biocide (Bacteria Control): This is the crucial missing ingredient in home remedies. It kills bacteria and other microorganisms, keeping the water clear and the stems unclogged.
You can easily replicate this professional formula at home with common household ingredients. Forget the myths and partial solutions; a complete recipe is what truly works.
- Component 1 – Sugar (food): Add 1 tablespoon white granulated sugar per quart of water to provide essential carbohydrates for cut flowers.
- Component 2 – Acidifier (water uptake): Add 2 tablespoons fresh lemon juice or 2 tablespoons white vinegar to lower pH and improve hydration.
- Component 3 – Biocide (bacteria control): Add 1/2 teaspoon household bleach (unscented only) to kill bacteria and prevent cloudiness.
- Mix all ingredients thoroughly in warm water until sugar dissolves completely, then pour into a clean vase.
- Replace the solution every 2-3 days or when water becomes cloudy.
Understanding this three-part system helps to see why so many common home remedies fall short. They may address one part of the problem but often ignore the others, leading to mediocre results.
| Home Remedy | Sugar (Food) | Acidifier (pH) | Biocide (Bacteria) | Effectiveness |
|---|---|---|---|---|
| Aspirin | ❌ None | ✅ Weak acid | ❌ None | Partially effective – lowers pH only |
| Copper Penny | ❌ None | ❌ None | ✅ Mild fungicide | Partially effective – fights bacteria only |
| Vodka/Clear Alcohol | ❌ None | ❌ None | ✅ Slows bacteria | Partially effective – bacteria control only |
| Lemon-Lime Soda | ✅ High sugar | ✅ Citric acid | ❌ None | Moderately effective – missing biocide, bacteria can thrive |
| Complete DIY Recipe | ✅ 1 tbsp sugar | ✅ 2 tbsp lemon juice | ✅ 1/2 tsp bleach | Highly effective – all 3 components balanced |
When to Buy Flowers to Ensure Peak Bloom on Party Day?
Timing is everything in floral design, especially when preparing for an event. Buying fully open, perfect-looking flowers the day of your party is a recipe for disappointment. Most flowers will be past their prime by the time your guests arrive. The professional approach is to practice bloom cycle management: buying flowers when they are still in bud and conditioning them to open perfectly on your target day. This requires planning and thinking backward from your event date.
The ideal time to buy depends entirely on the type of flower. Fast-blooming flowers like tulips might only need a day or two, while tightly budded lilies could require a week to open beautifully. When you’re at the store, look for buds that are showing a hint of color but are still mostly closed and firm. This is the sign of a fresh flower with a long vase life ahead of it. For flowers like hydrangeas that don’t open much after being cut, you’ll want to buy them closer to the event date when they are already mostly in bloom.
This « reverse bloom calendar » is a mental tool florists use to ensure every stem in an arrangement is at its peak for a wedding or event. By purchasing your flowers in advance, you give them time to hydrate properly and start their blooming process under your control.
Here is a simple guide for some popular flowers to help you plan your purchasing schedule and know what to look for at the store.
| Flower Type | Buy How Many Days Before Event | Bud Stage to Look For | Storage Method |
|---|---|---|---|
| Lilies (Asiatic/Oriental) | 5-7 days before | Closed buds, first bud showing slight color | Cool room (60-65°F), stems in water |
| Roses | 3-4 days before | Tight buds with outer petals just starting to unfurl | Cool room, re-cut stems daily |
| Tulips | 2 days before | Still green and closed, firm to touch | Refrigerator (not with fruit), wrapped stems |
| Peonies | 3-5 days before | Marshmallow-soft buds showing color | Cool dark place, change water daily |
| Hydrangeas | 1-2 days before | Mostly open blooms (they don’t open much after cutting) | Deep water, cool room, mist daily |
Sometimes, despite your best planning, nature has its own schedule. If your flowers are opening too slowly or too quickly, you can intervene. These simple hacks give you a degree of control over the blooming process.
- To SPEED UP blooming: Place flowers in a warm room (70-75°F) with bright indirect light. Re-cut stems at a sharp angle and place in warm (not hot) water.
- To SLOW DOWN blooming: Store in a cool, dark place like a garage or basement (38-45°F). Keep them away from ripening fruit which releases ethylene gas that accelerates aging. Change to cold water daily.
Why Do Bespoke Bouquets Create Stronger Emotional Connections Than Premade Ones?
A premade bouquet from a cooler is a commodity. A bespoke bouquet that you arrange yourself is a story. The true art of floral design goes beyond technical skill; it’s about creating emotional resonance. This is achieved through personalization and intention. When you move from simply arranging pretty colors to thoughtfully selecting blooms that carry meaning for the recipient, the arrangement is transformed from a decoration into a heartfelt message. This is why a hand-arranged bouquet, even with its imperfections, often feels more special than a flawless but generic store-bought one.
This practice, which I call floral storytelling, involves choosing flowers based on their personal significance or symbolic meaning. Did your friend just start a new venture? Sunflowers symbolize happiness and new beginnings. Do you want to offer a message of support? Eucalyptus represents protection. Were you married in June? Including roses, the birth flower for that month, in an anniversary bouquet adds a deeply personal layer. It’s about embedding a narrative into the arrangement that only the giver and receiver might fully understand.
The act of creating itself—thoughtfully selecting each stem, considering its placement, and building the arrangement with a person in mind—infuses the bouquet with care and intention. This human touch is palpable and creates a powerful emotional connection that a mass-produced product can never replicate.
You don’t need to be an expert in the Victorian language of flowers to do this. A simple framework can help you start telling stories with your arrangements. This process turns flower arranging from a hobby into a meaningful form of communication.
- Step 1 – Research Personal Significance: Identify the recipient’s birth flower, favorite color, or flowers from a shared memory or meaningful location.
- Step 2 – Assign Symbolic Meaning: Choose flowers that tell a story—sunflowers for happiness and new beginnings, eucalyptus for protection and support, roses for enduring love.
- Step 3 – Incorporate Texture for Personality: Pair bold, textured blooms for vibrant personalities or soft, delicate flowers for gentle, introspective individuals.
- Step 4 – Create a Narrative Arrangement: Position focal flowers to represent the journey—tight buds for potential, open blooms for achievements, trailing foliage for lasting connection.
Why Is Chicken Wire the Secret to Airy, Organic Arrangements?
For decades, floral foam was the industry standard for creating structured arrangements. However, a growing movement towards more sustainable and natural-looking design has brought a classic tool back into the spotlight: chicken wire. This simple, reusable material is the secret behind the airy, « garden-style » arrangements that feel effortless and organic. Unlike rigid foam, which forces stems into fixed positions, chicken wire provides a flexible matrix of support that allows flowers to move and « dance » naturally.
The magic of chicken wire lies in its ability to create negative space and natural movement. By forming a loose ball of wire and placing it in your vase, you create a web of hexagonal holes. Stems can be inserted through these holes at any angle, allowing them to lean and cross over each other just as they would in a garden. This flexibility is what gives arrangements their breathability and prevents them from looking stiff or overly dense. It encourages a more intuitive and less rigid design process.
Case Study: Chicken Wire vs. Floral Foam in Professional Garden-Style Designs
Research from Mississippi State University Extension highlights this difference. The study demonstrated that chicken wire mechanics are essential for achieving the garden-style aesthetic. It allows stems to find their own natural angles and creates the crucial negative space that foam-based designs lack. Professional florists in the study reported that chicken wire’s flexibility was the key to achieving a coveted airy, naturalistic look, as it provides support without dictating rigid placement, allowing flowers to be arranged more organically.
Using chicken wire is straightforward and is a far more sustainable choice than single-use, non-biodegradable floral foam. It can be reused indefinitely and works in almost any size or shape of vase. Mastering this simple mechanic will fundamentally change the way your arrangements look and feel.
Your Action Plan: The Ball and Secure Method
- Cut the Wire: Cut a piece of chicken wire (24-gauge green wire is ideal) approximately 3 times the width of your vase opening.
- Form the Ball: Form the wire into a loose ball or pillow shape with at least two layers. Don’t crush it tightly; the open space is what holds the stems.
- Place in Vase: Place the wire ball into the vase so it sits just above the rim. This provides stability at the key pivot point.
- Secure with Tape: Secure the wire by crossing two pieces of waterproof floral tape in an ‘X’ pattern over the top and down the sides of the vase.
- Arrange and Fill: Fill the vase with water and your prepared flower food, then begin inserting stems at various angles, starting with your structural greenery first.
Key takeaways
- The secret to long-lasting flowers is science-based hydration: cut stems underwater to prevent air blockages and use a balanced, three-part floral food to nourish blooms while killing bacteria.
- Structure is not optional. Simple mechanics like a tape grid or a ball of chicken wire provide the hidden support needed to control stem placement and achieve a full, professional-looking design.
- Personalization transforms a bouquet from a mere object into a meaningful message. Using flowers to tell a story based on shared memories or symbolism creates a powerful emotional connection.
How to Apply the Golden Ratio to Your Home Floral Arrangements?
Once you’ve mastered the technical skills of hydration and support, you can begin exploring the artistic principles of design. The most powerful and timeless of these is the Golden Ratio. This mathematical principle, approximately 1:1.618, appears everywhere in nature—from the spiral of a seashell to the arrangement of seeds in a sunflower. Because our brains are hardwired to find it beautiful, using it as a guide for your floral arrangements is the secret to creating compositions that feel naturally balanced and harmonious, rather than forced or awkward.
In floral design, the Golden Ratio is most often applied as a simple rule of thumb for proportions: the height of your arrangement should be about 1.5 times the height of your vase. For example, if your vase is 10 inches tall, the tallest flower in your arrangement should reach about 15 inches above the rim of the vase, making the total visual height roughly 25 inches. This prevents the arrangement from looking top-heavy or stunted.
This principle of creating a visually pleasing proportion of about one-third container to two-thirds flowers also applies to width and focal point placement. It’s a guideline, not a rigid rule, but it provides a fantastic starting point for creating balanced asymmetry. It helps you avoid the beginner’s trap of placing the biggest flower dead center and instead encourages a more dynamic, natural composition.
According to design principles, making the arrangement 1.5 to 1.6 times the vase height creates a naturally pleasing proportion. Here is how you can apply this simple but powerful rule.
- Height Application: Make the total arrangement height 1.5 to 1.6 times the vase height. For an 8-inch tall vase, aim for your tallest stems to reach 12-14 inches above the rim.
- Width Application: If your vase is 6 inches wide, your floral spread should be approximately 10 inches across, creating a pleasing balance.
- Focal Point Placement: Position your largest or most dramatic flower about one-third of the way into the arrangement, not in the direct center, to create a more dynamic visual path.
- Visual Weight Distribution: The vase itself should occupy roughly one-third of the total visual space, with the florals taking up the remaining two-thirds. This creates a stable and grounded look.
By consciously applying this principle, you are mimicking the harmony found in nature. This is the ultimate goal of organic floral design and the final step in elevating your skills from hobbyist to true home artist.
Now that you are equipped with the foundational science and artistic principles of floral design, the next step is to start practicing. Pick up a simple bouquet on your next trip to the store and begin experimenting with these techniques. You have the knowledge to create something beautiful, long-lasting, and uniquely yours.